 Bagels! Yes, I’m blogging about bagels again, for the third (or is it fourth?) time.
Previously, I made and blogged bagels for the BBA Challenge from Reinhart’s book and a couple of other times based on Mike Avery’s recipes for Sourdough Bagels. While the Reinhart version was good, the Avery Sourdough were decidedly better. But now it’s time for a new contender.
 Stepping up to the plate for the battle to Bagel Supremacy are the bagels from the Hamelman book Bread which just happen to also be part of the Mellow Bakers challenge for April 2010. Convenient, no?
A quick look at the recipe and, bypassing things listed as required like bagel boards, I note that the steps here are pretty much the same as the other bagel recipes. Mix the stiff dough, knead for a short while, proof, shape, proof again, boil and bake. That is the SHORT version of course, but the steps are not much different from the others. Basically this tells me I’m in familiar territory so no surprises are expected. Good. Let the fun begin!
The ingredients list contains not a whole lot: High Gluten flour, water, yeast, salt and a little malt. Let’s have a look:
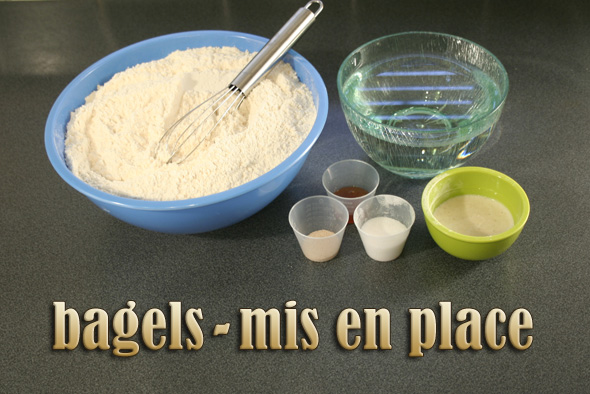
Because high gluten flour isn’t exactly easy to get one’s hands on in this end of the world (as in: NOT), I’ve used my unbleached bread flour (13% protein) and added 3% (by weight) Vital Wheat Gluten. So as the recipe called for 907 g (well, it called for 2 lbs but I converted all weights to metric) 3% of that is 27 grams. I therefore reduced the flour by 27 g and added 27 g of VWG. Pretty simple.
Hamelman also wants diastatic malt powder. Again, no can do so malt syrup would have to stand it place. The yeast, water and salt were no problem. In the green bowl is 36 g of excess sourdough starter from a feed yesterday so I’ll put that in as well. Since it’s 100% hydration, I know that it contains 18 g of flour and 18 g of water, so I reduce those two by 18 g each as well.
OK, that’s all the ‘tricky’ stuff we need to do. On with the bagel making!
(You can always click on smaller images in this blog to see the large, clearer version)
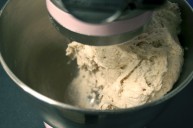
Into the mixing bowl go the dry ingredients and the starter. This is mixed for a few seconds then I added the water and malt syrup (not shown) and continue mixing for a little over a minute until all the ingredients were blended, no dry flour remained in the bottom.
Caution: Bagel dough is VERY stiff so if you do this with your stand mixer, keep an eye on it to make sure you’re not frying the gears. You may want to give the mixer a 5 minute cooling rest if it gets too hot or begins to smell like hot gears. Do not go past speed 2 when mixing bagel dough unless you really want to buy a new DLX mixer.
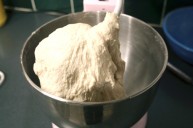
The 1 or 2 minute mix was not too tough on the mixer, however. I then switched to the dough hook for a 5 to 6 minute kneading at speed 2. At that point, the mixer was starting to feel a little hot and was struggling at times with the dough. Fortunately, the dough was pretty much done. The mixer survived yet again. Dang, I really wanted a new DLX. Oh well, maybe next time.
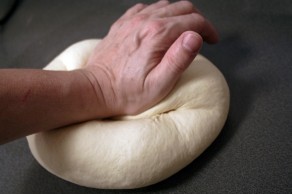
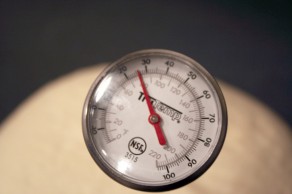
I turned the dough out onto the bare counter and give it another quick minute of hand kneading, partly to get a feel of the dough and partly to make sure it’s done kneading. The dough, while stiff, is still supple and smooth. This takes less than a minute’s work. And it’s not in the recipe, for those following along.I check the dough temperature, it’s about 78º, 2º more than the recipe requires. Close.
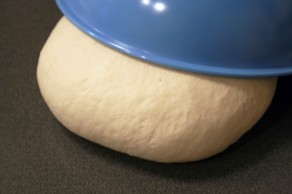
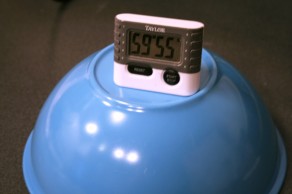
I smooth up the ball of dough then drip a little oil on the counter and smear it around. I place the dough on that, smear the rest of the oil into the bowl i had flour in, the overturn the bowl onto the dough ball. This will work as the covered bowl while the dough bulk proofs for an hour. We don’t expect much expansion so I am fine not seeing through to gauge the dough’s size increase. I set the timer for 60 minutes and go keep myself busy watching the latest episode of FlashForward.
Ding! Hour’s up. Time to get shaping.
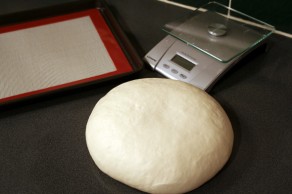
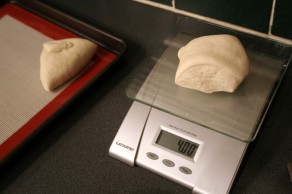
The dough ball has expanded, but not by very much. The next step is to dive the dough so I grab the scale again and have a lined tray ready to accept the 4 oz balls of dough.
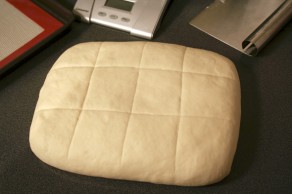
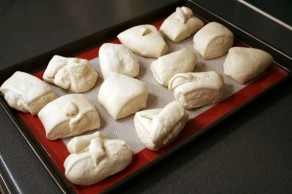
Although the recipe says it makes 13 bagels, I wasn’t going to try and figure out how to mark 13 pieces so 12 would have to do. It’s just to give me a rough idea how big each chunk should be anyway. I’ll have extra at the end which will, I hope, be enough to make that 13th bagel. We will want the dough chunks rather squared up – you’ll see why in a second, so I made the dough ball a rectangle. I’ll be using my bench scraper to cut. The counter is free of flour, you will note, as I don’t want to make the dough exterior dry.
I cut the dough chunks based (roughly) on my guide lines and snip off or add little bitty pieces to get closer to 4 ounces. Some ended up 3.8, others 4.2 oz. but most were 4 oz. Eventually I got to piece #13 and had to nip a tiny bit from several of the bigger pieces to get it up in the high 3 oz. area. Certainly not exact measurements here but good enough. Anyone who complains their bagel is a fraction under 4 oz can just leave them for other people, so there.
I toss one of my aluminum turkey roasting pans on top of the dough chunks to keep them from drying and we’re set to go. A plastic bag would work fine too.
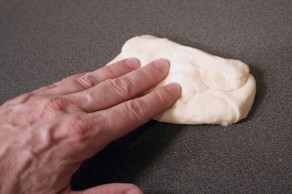
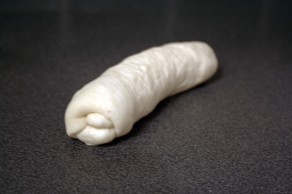
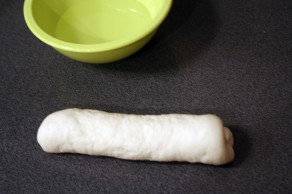
I grab one of the chunks and flatten it into a small rectangle. I then roll the dough into a small log.
It’s much like making a minuscule batard, really. In no time, I have rolled all the dough chunks into a whole lot of little logs.
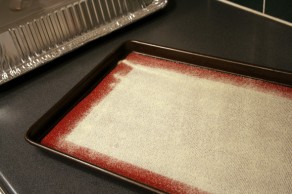
Next, the cover goes back on the tray and I sprinkle some semolina onto another prepared tray.
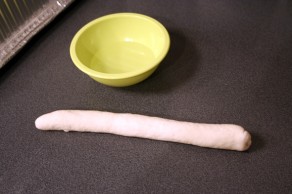
I set out a small bowl of water and take one of the little logs out from under the cover.
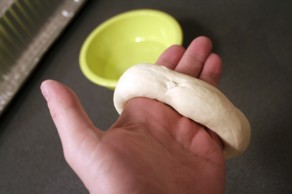
With both hands set on top of the log, I roll it back and forth while spreading my hands apart, thereby stretching the log to about a 10″ (25cm) rope. Try to avoid tapering the end like I did on the left, you want the end stumpy, as on the right.
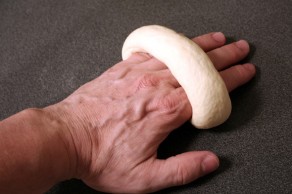
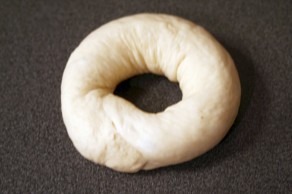
Next I wrap the rope around my hand with the two ends under my palm. If your dough is moist enough, you may not need to do this but I dipped a finger in the water and rubbed it onto the ends of the dough rope. Then pressing the two ends together, I roll the ring firmly onto the counter to seal the joint well. Again, all of this is done on a dry counter top. If you keep your dough covered and moist, all this will be easy peasy.
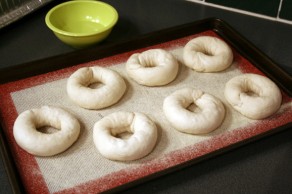
And there’s a nice, well stuck together bagel. I continue until I’ve filled the tray, then pull the remaining logs off the other tray, cover it with a little semolina and keep at it until all the bagels are shaped. Some stick together well on their own, most get a smear of water.
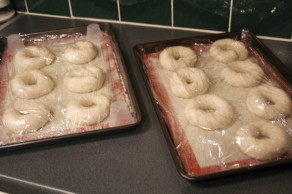
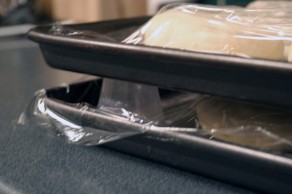
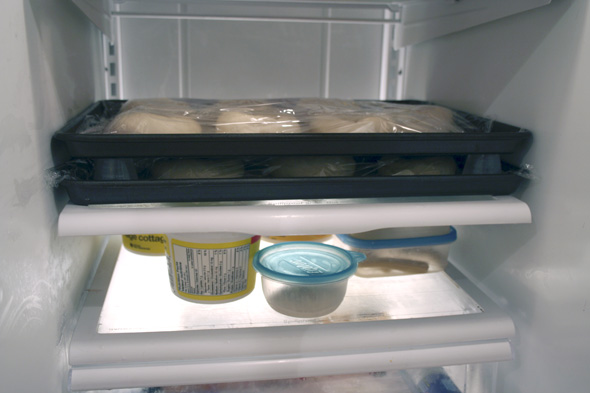
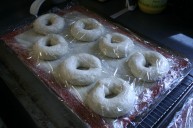
And now I run into a problem. There’s no way I can use up two shelves in the refrigerator, I can shuffle things around enough to get one free shelf only. Two is just not happening. So time to get clever. I plop some of my little plastic measuring cups in each corner of one of the (now cling-wrap covered) bagel trays, then pile the other on top of these mini supports. I can now have two trays where I previously had one.
And into the fridge, using up only one shelf, they go to retard overnight. Good night, little bagels. See you in the morning!
(No, I don’t really talk to my bagels or any other bread products. Not usually, anyway.)
Now I clean up all the dirty dishes I just made, wipe down the mixer and counter and get the kitchen back to something looking a little less like utter chaos. Then it’s transferring and editing the photos and writing this blog, part one. Bedtime for me too!
Next day, it’s time to get baking. First thing: while setting up, I’m pre-heating the oven to 500º which is awesome on the hottest April 3rd in history (28ºC/82.4ºF). Oh well. If you can’t stand the heat… you don’t get bagels.
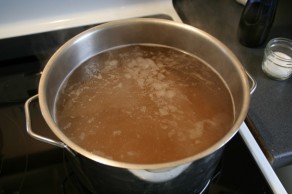
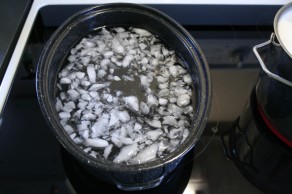
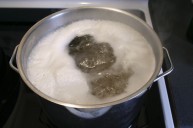
I put on the Big Pot of hot tap water and begin to heat it, adding about a quarter cup of malt syrup to get it to “tea colour” as noted in the book. I used 1/4 cup because that’s all I had left in the jar and wanted to empty it, I could have used a little less. I also set out another pot and filled it with icy ice water. We wait for the malt water to come to a boil. Fortunately, the oven hits 500º as we’re waiting.
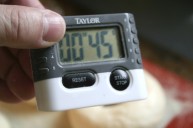
Once the water is at a good rolling boil, I get a tray of bagels from the fridge and set the timer to 45 seconds (don’t turn it on yet).
This is where it starts to get a little hectic so I may not get photos of everything…
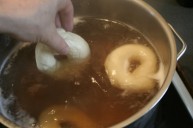
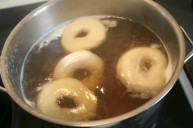
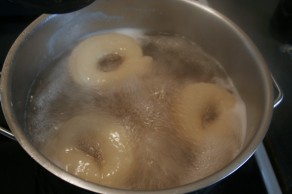
I drop a few bagels into the boiling water and turn the timer on. Being cold, this brings the water temp down a fair bit; a bigger pot with more water wouldn’t be as affected by the cool bagels. As the water temp comes back up, the bagels bob around in the hot bath. At about the halfway point, I make sure the bagels get a flip in the water.
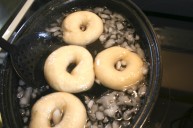
Once they’ve boiled for their allotted time and puffed up somewhat, they come out of the hot and directly into the cold water bath. Just like a New Year’s Polar Bear Dip, except way prettier to look at. They will stay here for 3 to 4 minutes. As they cool, I do the other three bagels from that tray and they eventually go onto the ice bath too.
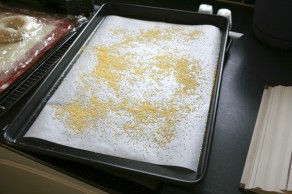
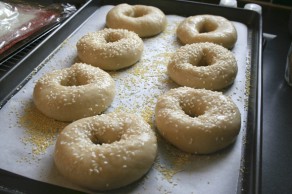
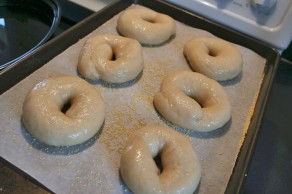
With that tray free, I switch out the Silpat (which can’t go into a 500º oven anyway) for parchment sprinkled with coarse cornmeal, transfer the now cooled bagels to this and sprinkle several of them with sesame seeds. The recipe says to pop the wet bagels onto a plate with your seed of choice (sesame, poppy, etc.) but I’ve done that before and the plated seeds get all wet and glumpy after the first couple of bagels. I’ve found sprinkling the seeds works just as well. Give each method a try to see which you like better.
This tray is ready for the oven so I set it aside while I work on the next.
Following the same procedure, I finish up the next tray of bagels and this time leave them plain.
With both trays done, the next step is baking. I don’t have photos of this process but simply, I put the trays in the oven with the racks set at centre. I did not use a hearth oven this time simply because I didn’t want to heat the kitchen at 500º for an hour.

I also did not make or use bagel boards; I’m not sure they make sense in a home baking situation. I can see them being terribly useful in a big bagel oven where you’ve got 22 bagels lined up per board (I counted), reaching six or seven feet deep into the oven.
Not so much in the home oven, where you can reach the furthest one in the back of the pan easily with a pair of tongs and the most you can fit is two or three deep. Bagel boards would actually be a nuisance in this situation, I suspect. So unless someone wants to build me a nice wood fired oven, even if it’s just 3 or 4 feet deep, we can likely do without bagel boards.
Setting the timer to 7 minute, about halfway through baking, I slid the trays in. At 7 minutes, I took out the trays and flipped the bagels over (after removing the cornmeal-covered parchment). I think they could have waited a few more minutes before doing that, they were pretty anaemic still.
They baked ‘upside down” for about 5 more minutes and were turning a light golden colour but the tops, currently facing down, were not, so I took them out again and gave them another flip back right ways up. I let them bake for several more minutes until the tops were nicely coloured. Total time: about 18-20 minutes. Probably because of the multiple openings of the oven door. I’ll have to rethink this process next time to avoid this.
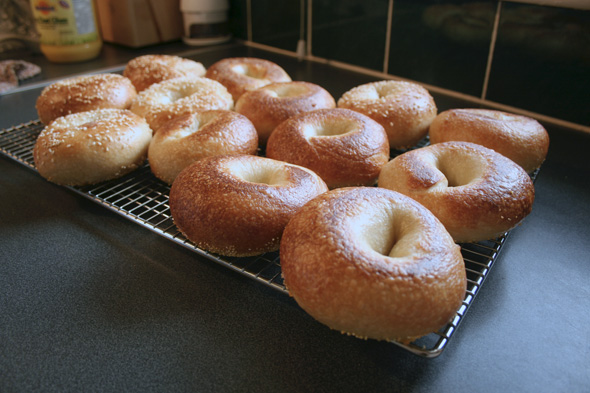
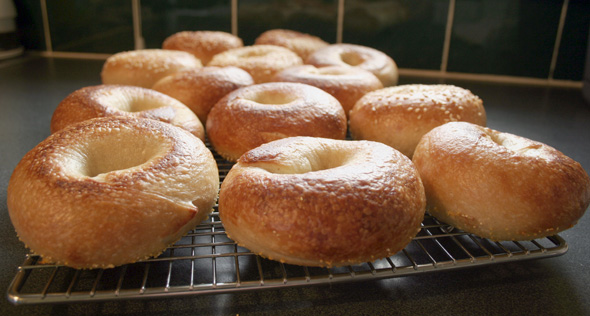
Still out they came nice and golden brown. Wanna see?
Wasn’t sure which photo showed them best so I’ve included a few. Click the smaller ones for a bigger version.
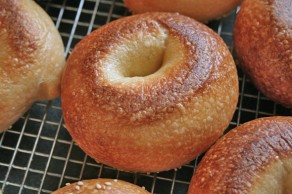
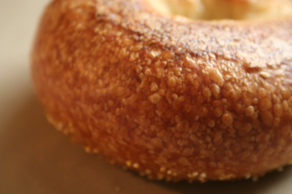
One really cool thing about retarding bagels in the fridge: this gives the crust a lovely texture referred to as “Bird’s Eyes” – no, those little bumps aren’t sesame seeds but tiny little blisters on the crust. You will not get this with mass produced store bought bagels; Bird’s Eyes occur when a bread is left to do a final proof/retardation in the fridge. Commercial bagels – or breads in general – don’t get that extra time to develop flavours. The texture won’t change the taste any but it looks neat and it is a way to tell your bread wasn’t rushed through the process.
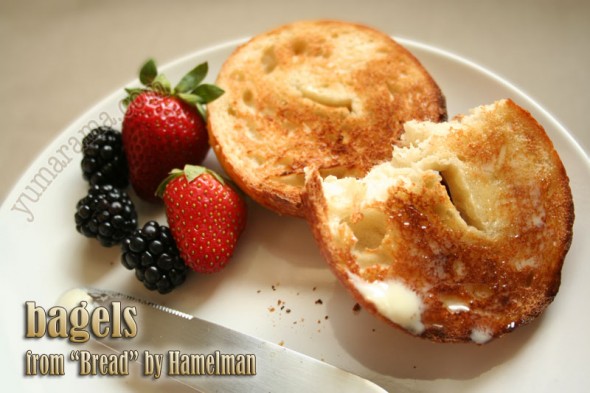
And lastly, I sliced one up, the “runt” that was made from the remainder dough. Yes, I did NOT wait “long enough” for it to cool down. I’m bad. And this also happens to be our final Glam shot.
Based on this one bagel which barely lasted through it’s photo shoot, these are very nice bagels indeed. The interior is not too “bready” while the crust has a nice chew. The flavour is pleasant although not particularly distinguished as the sourdough bagels are. The addition of the old starter didn’t seem to do much here, likely since they weren’t proofed with a sourdough process in mind.
So does this one beat the BBA version? I do believe so. But it’s still not knocking out the Sourdough Bagels which, to be fair, isn’t too surprising since a good sourdough can bring along definite flavours you aren’t likely to find in normal yeasted bread. So no Champeen Title here, although a good runner up.
Still a definite success. I’d have no qualms giving them another try and I doubt this batch will last too long. Which is good because I want to make the Mellow Bakers‘ Light Rye next week.
Others Baking This Bread
I shall now direct you over to MellowBakers.com and the Bagels thread so you can read all about the gang baking bagels with, I’ll admit, varying degrees of success.
This bread was submitted to YeastSpotting.




Those look great, Paul! Bagels are extremely popular in this house, so I’m sure I’ll be making these. I thought the ice bath after boiling was an interesting step; I’ve never done that with any other recipe. I’m curious to see how these compare to the other bagels that I’ve made. I’ll have to take a look at the sourdough ones that you mentioned, too–I’d like to try those.
.-= Di’s latest blog post: When the moon hits your eye… =-.
I’m hoping to get to these next week . . . Yours look awesome! And I’m glad to know you used the malt syrup in place of the diastic malt powder . . . I have not been able to find it and I don’t want to have to order it online. Have you ever tried bagels with the powder instead? I’m curious about the differences for anyone who has tried both . . . maybe I’ll post it on the forum!
.-= Abby’s latest blog post: Mellow Bakers: Hot Cross Buns =-.
Magnificent post! As I ‘ve never made these before, this is incredibly helpful, with all those glorious photos and your explanation of what you are doing is just great. I always find that time stretches when making anything, so was very interested to hear that they took longer in the oven and how you compensated for it. Wonderful, thanks Paul!
Wow! Those bagels look great! Beautiful photos and a great tutorial. Thanks!
.-= Cathy (breadexperience)’s latest blog post: Making Jam: Carrot Marmalade =-.
Those are beautiful bagels, round and tall. They have the perfect shade of crust too. I will follow Hamelman’s flipping technique without using a board.
Now I want a bagel so badly.:)
.-= Oggi’s latest blog post: Apple Caramel Turnovers =-.
Oh, gosh… Paul, I was SOOOO decided not to make bagels….
Now, I am not quite sure, they look so beautiful, much more so than the BBA version
I’ll have to think about it – at any rate, rustic bread will come first. That much I know!
🙂
.-= SallyBR’s latest blog post: BANANA BREAD =-.
Superb! And great step by step pics!
.-= Tupper Cooks’s latest blog post: General Tso’s Chicken. =-.
Those bagels were quite the production number, but they sure look worth it. Just gorgeous!!
.-= Mimi’s latest blog post: If candy bars grew on trees =-.
Wow, these look great. I wasn’t so lucky with my bagels. Will probably blog about them tonight.
.-= ap269’s latest blog post: The Modern Baker Challenge: Quick Breads – Fennel Fig & Almond Bread =-.
A bagel throwdown! I love it.
These look awesome. They browned perfectly and look just like the bagels you can find here in NYC. I am definitely going to have to (a) get this book, (b) try this recipe, and (c) try the acclaimed sourdough recipe!
Oh no!! I loved the BBA bagels. I had perfected my technique and mastered those babies after making them 6 times. Now you tell me there’s a better bagel? I better get on it quick. I am intrigued by the ice water bath after the boiling and using the malt in the boiling water instead of in the dough is different from the BBA method as well.
I always learn something new from you. Love how you got 2 trays on one shelf in the fridge. Simple but so brilliant! And now I know how much VWG to add to bread flour (3 %) to up the protein content. I have been ordering the high protein flour from King Arthur and am getting killed on the shipping fees to Canada.
Great post!
Hello
Can I please have the exact quantities of ingredients of the bagel recipe above?
Thank you,
Ian
Hi Ian,
Because we are baking the entire book from front to back (with the OK of the author) we, as a group, made it a point to not publish all their recipes since that would, in effect, put Mr Hamelman’s book online when he’s trying to make income by selling the book. It would be somewhat disrespectful of the baker we hold in high enough esteem to be baking his “works”. So the short answer would have to be sorry, I cannot publish the recipe. I would point you to Mr Hamelman’s book as an excellent source of not only recipes but extensive knowledge of ingredients and process any serious bread enthusiast should have. It’s much much more than just a collection of recipes; it is defined, clear knowledge on the skills and art of baking. Click the Store Link for your area in the sidebar should you want to order a copy for yourself.
Now, having said all that… It may not be that difficult to locate this recipe from someone else who isn’t baking every single recipe, and who chooses to post it on their site. So if you fire up Google and search for Hamelman bagels, I’d bet you would find something helpful. I haven’t googled it myself so I’m really assuming here but I am pretty certain you’d find, if not THE recipe itself, then likely a “based on” version that is pretty close.
Elsewise, I’d point you to the bagel recipe on Mike Avery’s wonderful SourdoughHome.com website which I’ve also made and found quite wonderful. His online recipe makes just four 4 ounce bagels but it is easy enough to multiply that to 8, 12 or 16 if you wish. And if you don’t have or don’t want to make sourdough bagels, then (per four) replace the 30 grams of sourdough starter with 15 grams each of water and flour and instead use 10 g of Instand Dry Yeast and proof for an hour.
Good luck with your bake!
Wow, those bagels really look delicious. They are also perfectly cooked. You really did a fantastic job. This just inspired me to make some homemade bagels. My family and I love this for breakfast and snack so this will surely get everyone excited as I am right now! Thank you again for sharing this recipe and the tips.
just made some: yum, but… we did not get the birds eyes: do you have any suggestions? they are more tan/grey/brown (we have a pizza stone in the oven, but everything else we followed to the letter!)
thanks so much
p.s.have you changed what you do with the parchment paper? (just for the first 7 minutes)?
Hi John,
The Birds Eyes occur when the dough is refrigerated and are just something that shows up. Or not. You don’t need to have them but if they do show up, that’s cool too. In France, they’re considered a bit of a flaw while in North America, they are not. Just two views on the same thing, and it’s much easier to take a “they show up or not, that’s good either way” approach.
As for the parchment, that was me being a little too anal about the possibility of getting cornmeal on the tops of the bagels. It turns out that by the 7 minute mark, the tops are pretty much set and the cornmeal won’t transfer onto the tops any way so it’s not really an issue to be concerned with. So yes, I’ve changed what I do: I stopped worrying about it.
thanks paul: we’ll keep trying till we get them to look like yours! (now if you can just recommend a way to keep teenagers from decimating the bagel crop too fast…)