

I’ve been pumping out a small batch of cinnamon buns at work every day for the last couple of weeks. Thought I’d just pop a shot of them here and I’ve included the recipe below.
I’ve been making these same cinnie buns at the last two places I’ve worked and they are a hit, pretty well selling out each day. Shown below is the cinnamon-raisin version but I’ve switched out the fillings to other combinations as well, sometimes adding nuts, sometimes using cranberries, sometimes switching out the brown sugar for pastry cream.

For the Sweet Dough, I’m using a recipe that can be found in Ciril Hitz’s book, “Baking Artisan Pastries & Breads” on page 120.
Here’s the recipe, which I’ve slightly modified.
Basic Sweet Dough:
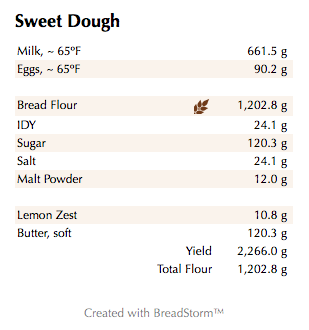
Our total weight for the above amount is 2,266 grams; adjust as needed.
Note: Malt Powder helps in breaking down the starches in the dough, feeds the yeast and helps caramelize (brown) the crust. However, it isn’t absolutely necessary so if you don’t have it on hand, it’s OK to skip it.
For these Cinnamon Buns, you’ll also need:
• Apricot (or apple, orange, etc.) clear jelly for glazing, warmed
• Butter, very soft; about a half pound (225g).
• Brown Sugar: 300g. Dark brown is good, golden is alright.
• Cinnamon: also plenty. Visit the bulk section of your favourite store. Buying “by the jar” is crazy expensive. I used about 18 grams in the batch above.
• Want to mix this ahead of time? Use 18g cinnamon to 300g brown sugar, put in a lidded container and shake, shake, shake. That’s 6% cinnamon to whatver the weight of the brown sugar is.
• Optional: Raisins (soaked in hot water about an hour then well drained), about 1½ cups. Thompson, Golden or even currants or cranberries, the choice is yours. Soak them while the dough is chilling in the cooler. Drain and pop into a plastic tub of some sort until you are ready to add to the rolls.
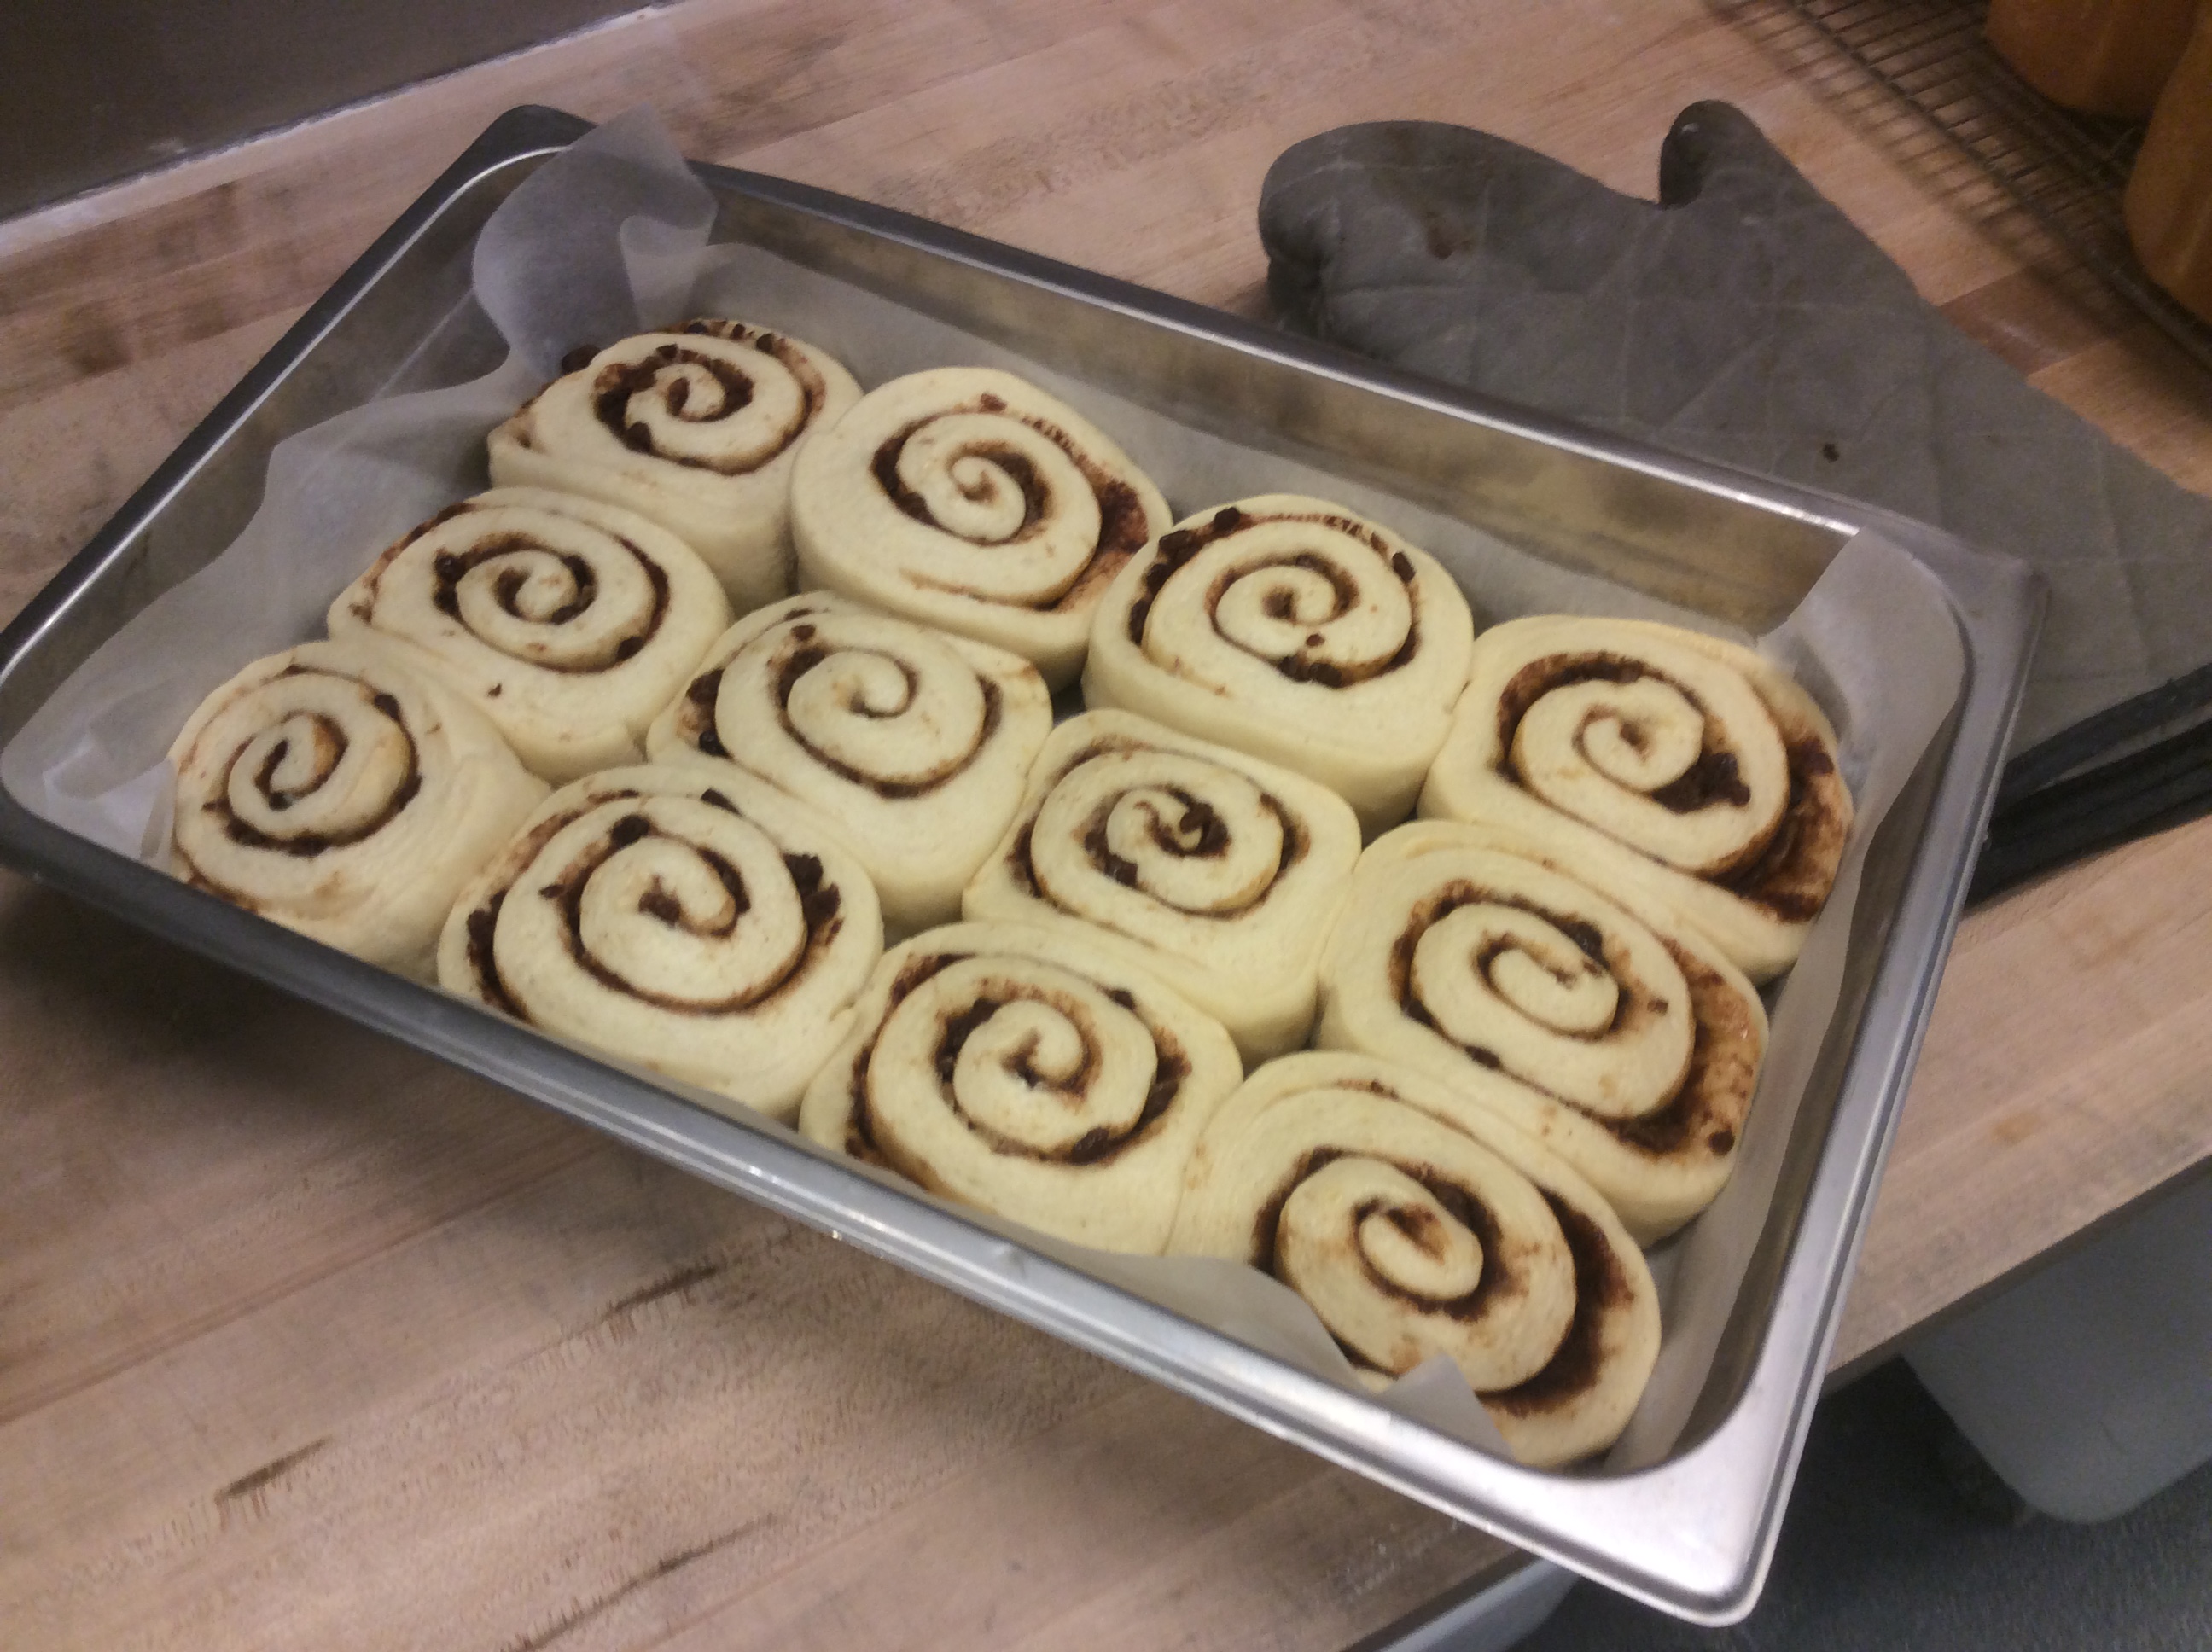
Please note that the ingredient amount above will make 12 rather large cinnamon buns, about 5″ by 5″ each as seen in the photos. Feel free to halve the recipe if this is too many or too big for you. (See where going by gram weight becomes really handy?) You might also want to make the rolled dough sheet smaller (narrower but longer) and get more kid-sized rolls.
Instructions: Making the Dough
First, our Mis en Place:
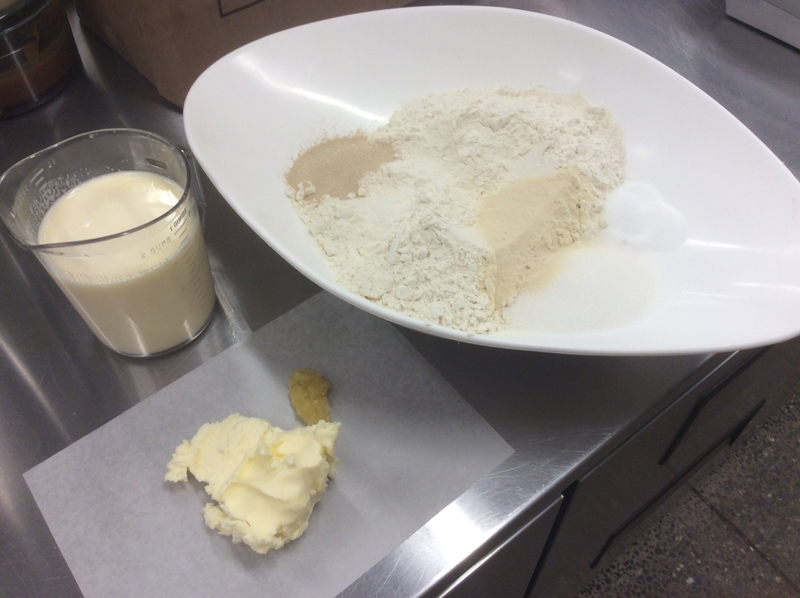
In a bowl, whisk the eggs smooth and add the milk. Microwave for about 20 – 30 seconds to warm up slightly to almost room temp.
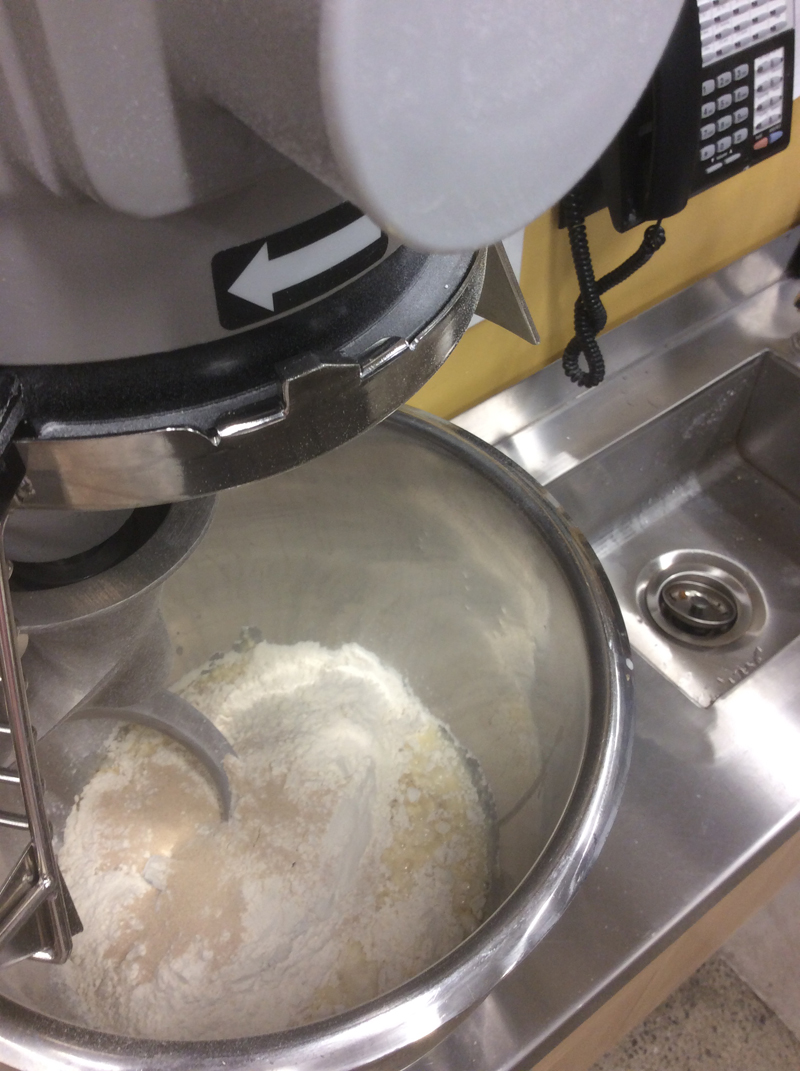
Add all dough ingredients except for butter and zest to a mixing bowl with a dough hook attached.
Mix on 1st speed just until the dough comes together, but shaggy.
Switch up to 2nd speed, add the zest and then slowly add the butter in a few small chunks, letting each one get mixed in before adding the next. Scrape down the sides of the bowl a couple of times to get the smeared butter back into the dough. Continue mixing until the dough gives a good windowpane, but no longer than 5 or 6 minutes.
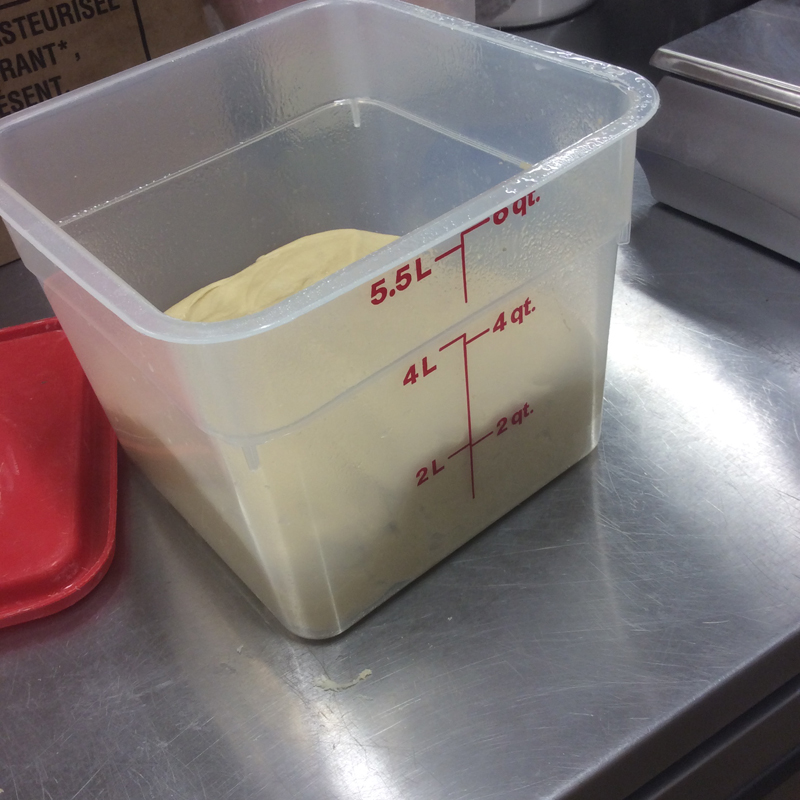
Place the dough in an oiled container, covered, and let proof at room temp for about 1 to 1½ hours until doubled.
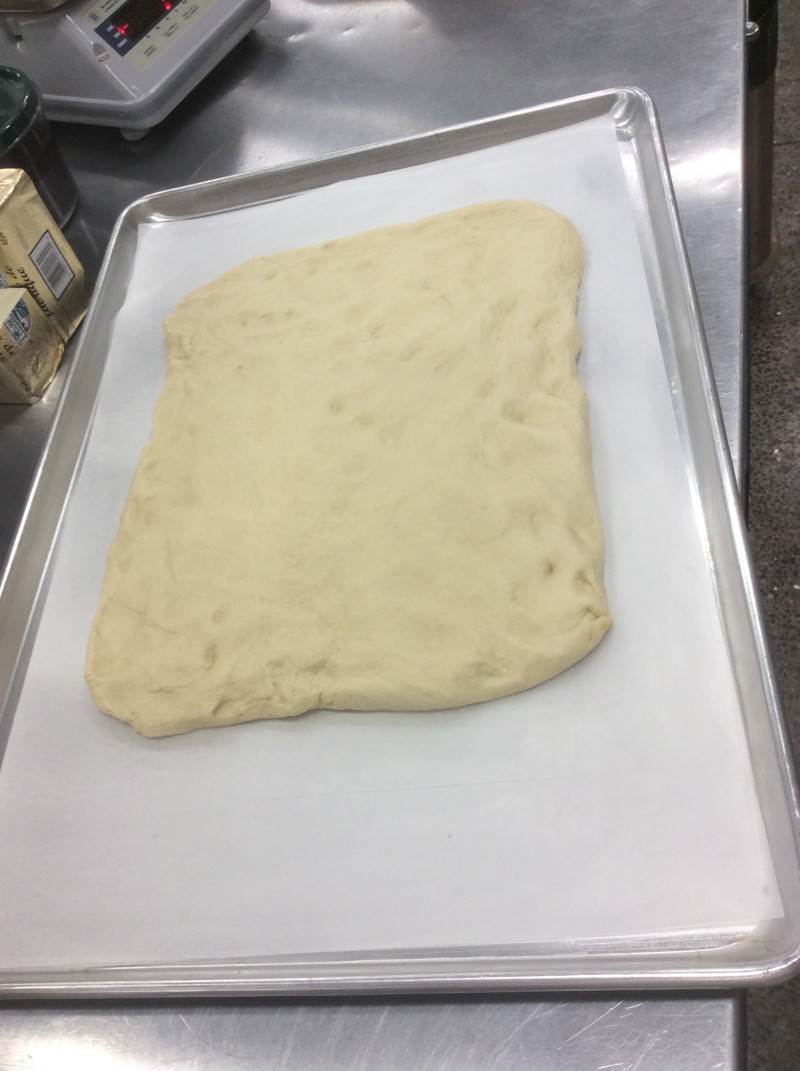
Once bulk proofed, spread dough out onto a parchment lined baking pan in a neat rectangle shape, cover with plastic cling or bag and refrigerate overnight (or at least 3 hours if you’re in a hurry). This pre-shaping will help when rolling the dough out later.
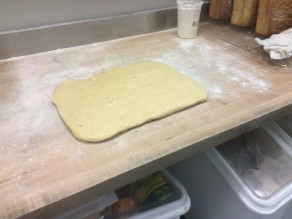
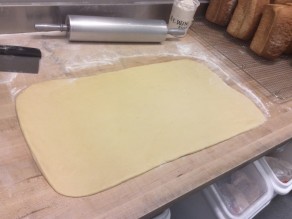
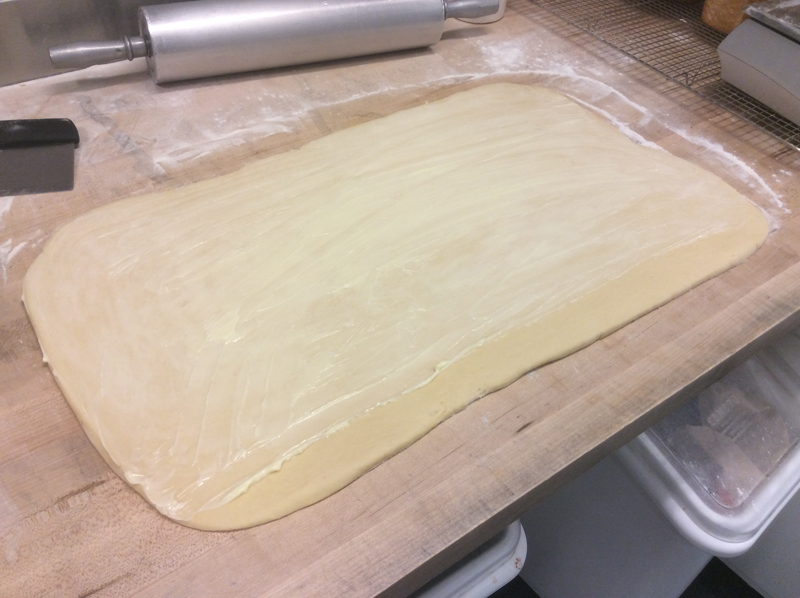
The next day, roll the still cold dough to a rectangle about 16″ in width and aiming for about ¼” thick, using enough flour to keep it from sticking to either the counter or the rolling pin. Aim to give your dough sheet nice, relatively straight edges. Try to work quickly enough that the dough remains cool. You should end up with a sheet that’s got the narrow ends on the left and right and the long sides at the top and bottom.
Add the Filling:
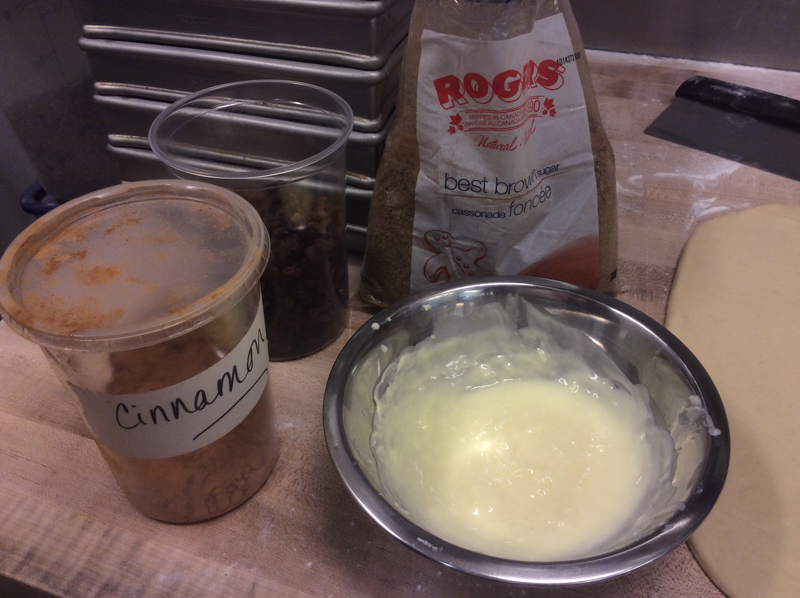
For our filling, we’ll use very soft butter, cinnamon, brown sugar and raisins.
Soften about 225 g of butter for a few seconds in the microwave – literally, 15 or 20 seconds – so it is very soft, just this side of melty. Smear the butter all over the dough (I used my hand) leaving the bottom 1″ of the long edge unbuttered.
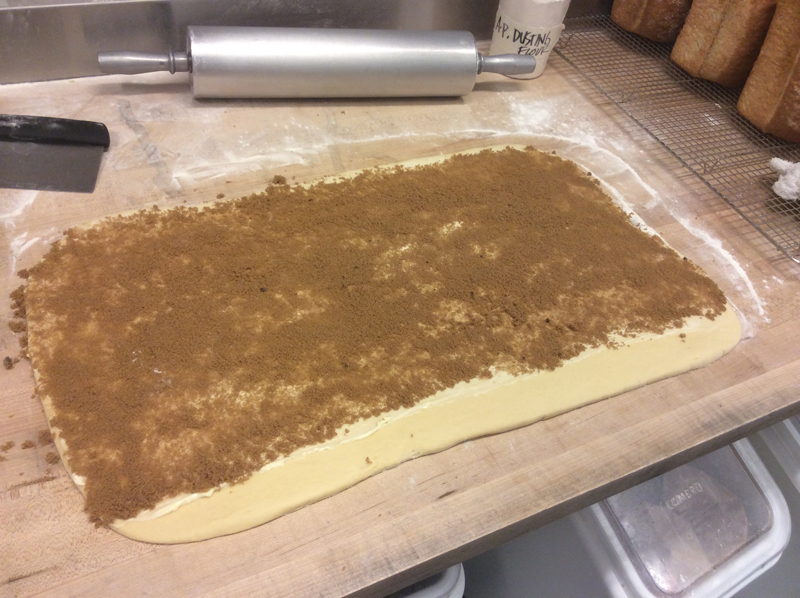
Next, spread a generous amount of brown sugar evenly over the butter so the dough is very well coated. Don’t scrimp; these aren’t “diet” buns! Keep it off that unbuttered edge as well.
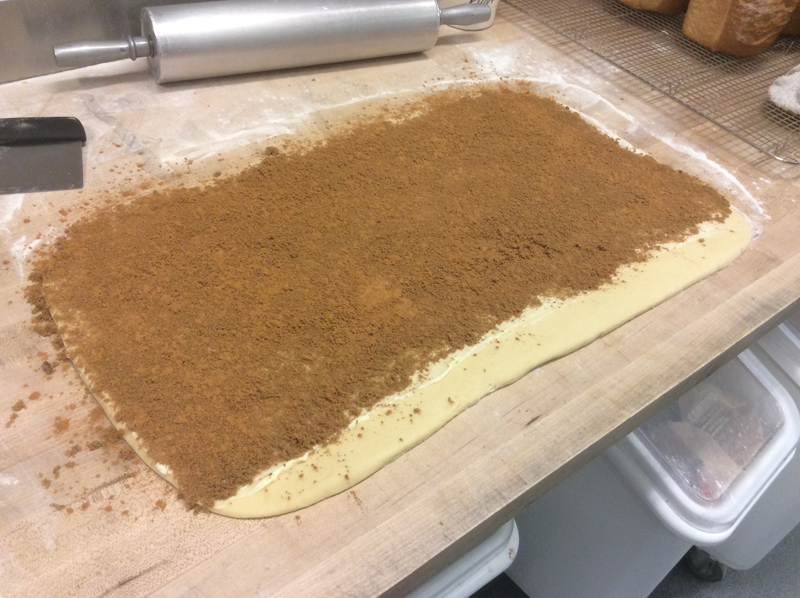
Dust this all very generously with cinnamon. A bit more than that. No, a bit more even. If you’re thinking “Wow, that’s a LOT!” then that’s about right. I use about 18 grams (which is about 4½ tablespoons) for this size recipe. They’re cinnamon buns, after all, not “buns with a vague hint of cinnamon”. In fact, when I used a more conservative amount, people said it lacked flavour.
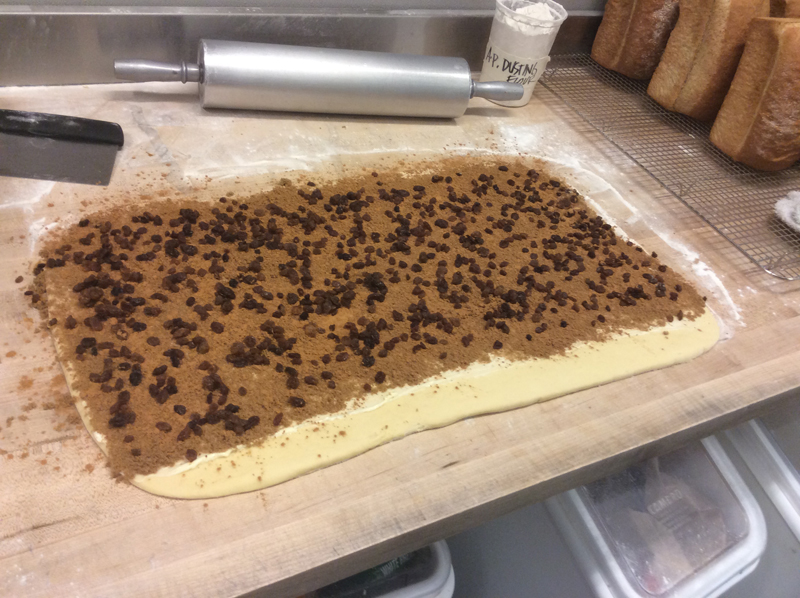
Finally, evenly spread the soaked and drained raisins (if you like them) on top of the sugar topping. Through all these steps, be sure the outside ends get as much filling as the middle; you don’t want the person who gets those end pieces to be shorted on the good stuff.

Let’s Roll!
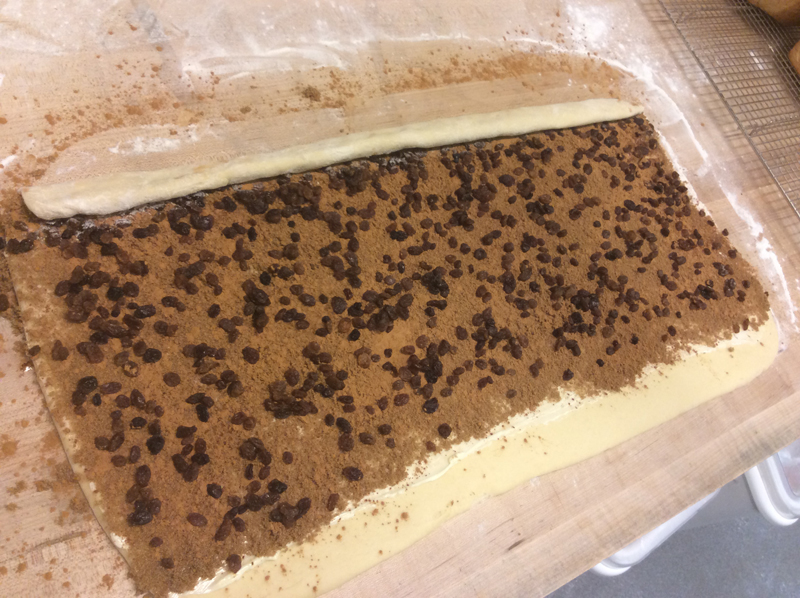
Start to roll the dough from the top side, carefully rolling down the very top edge over about an inch all along the length, then going back and rolling that one more turn. In a few more goes, you’ll be able to easily roll the dough down as it becomes rounder.
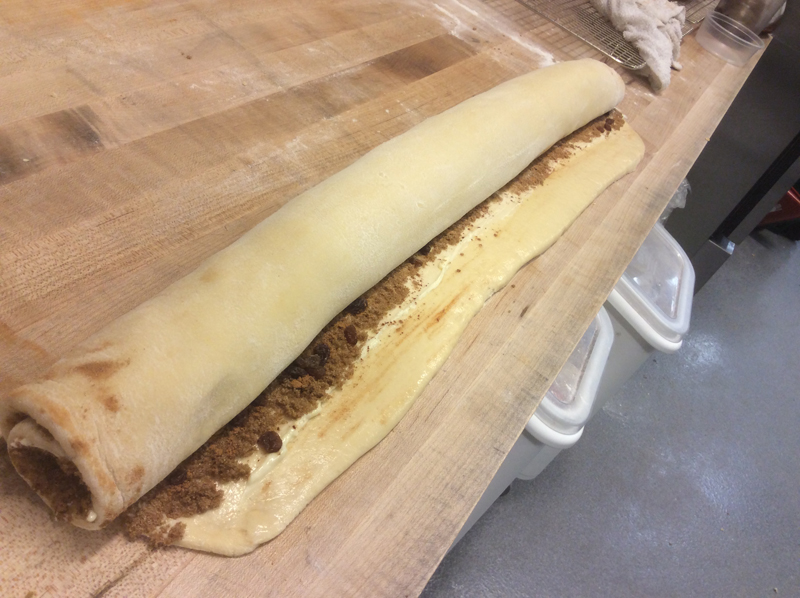
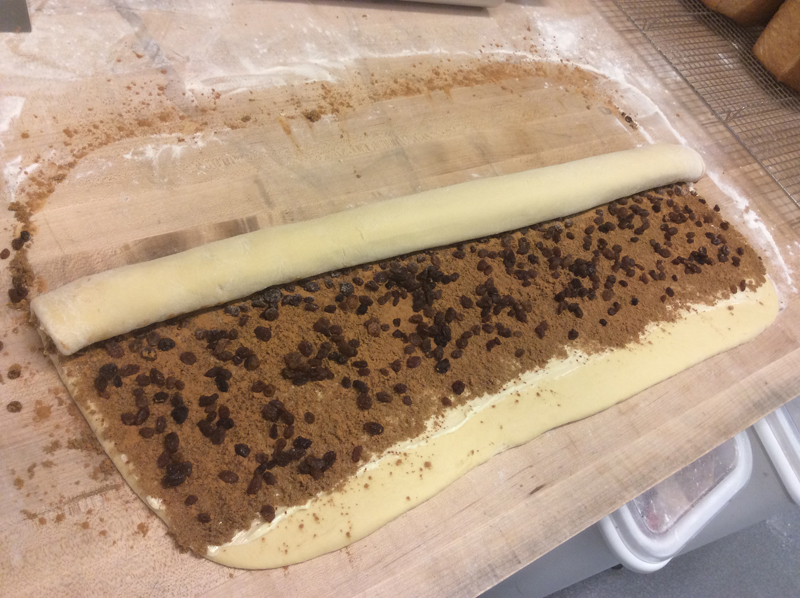
Before you get to the very bottom, brush the blank edge with some water and finally, roll the dough onto this wet edge; this will help ensure the end of the roll sticks to the buns. Roll it back and forth a couple of times to make sure it is well glued.
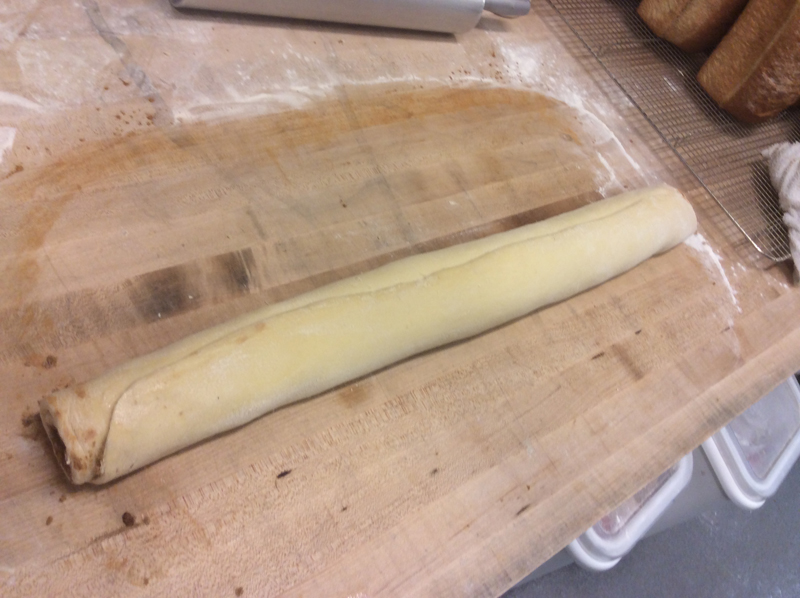
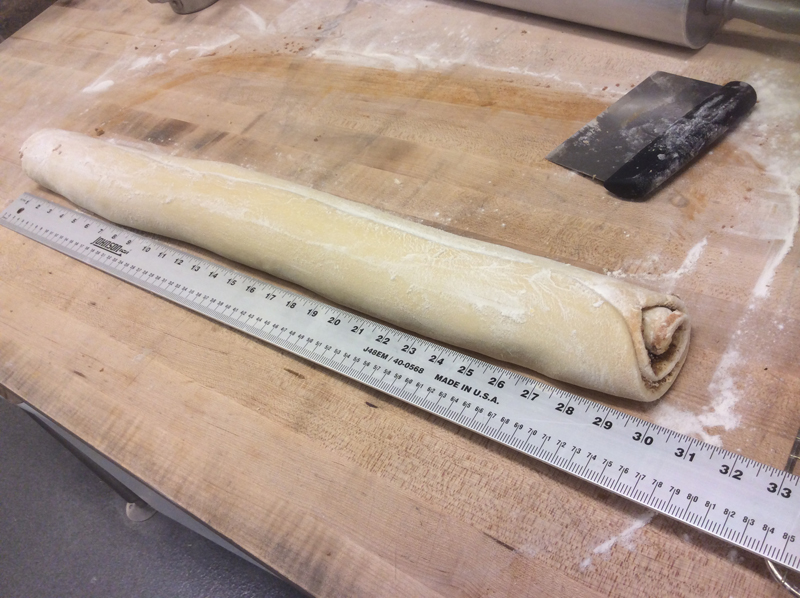
Your dough log will probably be very thick, a bit lumpy and really close to the edge of the counter; lift it and move it up some. Spread some flour over the seam to avoid it being wet and make handling the log smoother. Gently pull and stretch the log to work out any too thick areas and stretch it to a final length of about 36″ plus maybe a half inch more on each end. Cover the log with plastic and let it relax for about 5 to 10 minutes. This is a good time to collect your dishes and do a quick clean up.
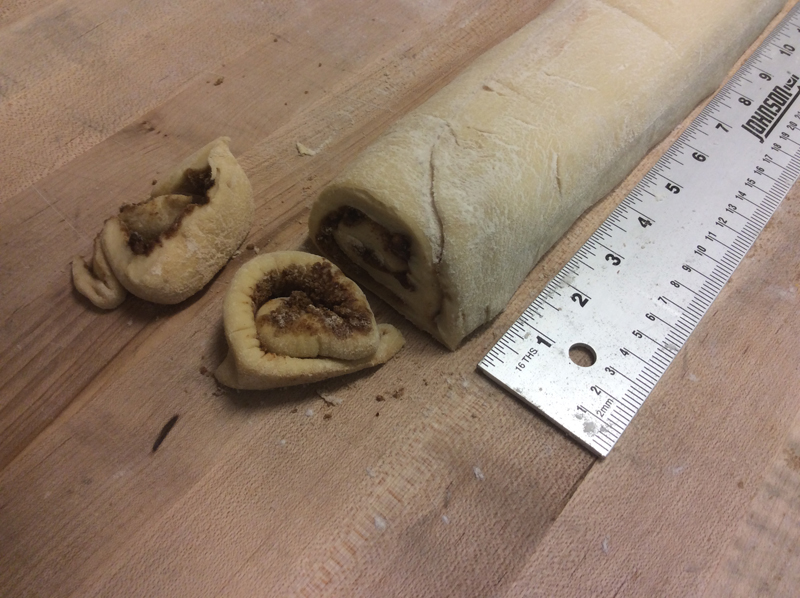
Trim those “extra” not-so-even half inch bits off each end (save these) so you have a length of 36 inches. With a ruler and using the back of a knife, lightly make a mark at every 3″ along the dough. You should then end up with 12 equal sized pieces. Once you’re happy they’re all pretty even, slice through with a sharp knife in a steady, confidant downward cut.
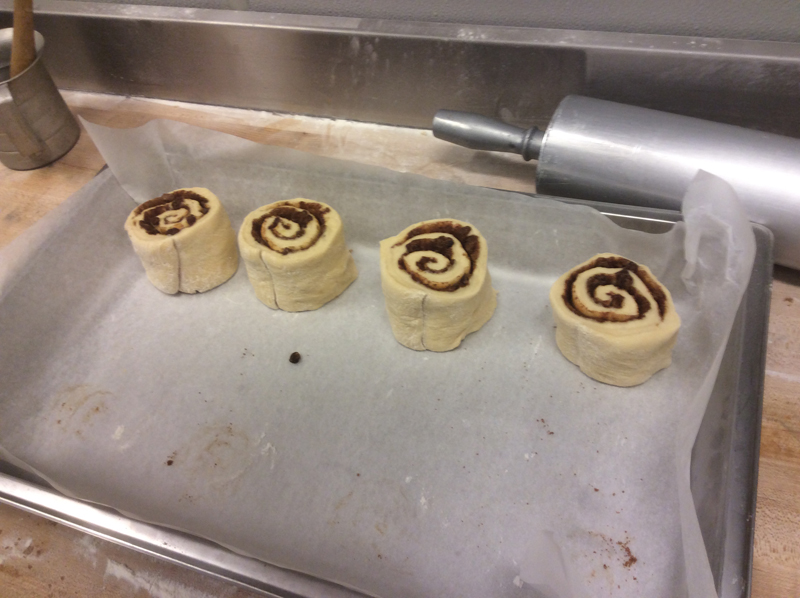

Put a sheet of parchment on a baking pan (or two) and place the rolls evenly in each pan with a couple of inches of space between them (they’ll expand to fill it), tucking bits of the extra cut-offs under any piece that seems in need. Check that the seam edges on the outside rolls are facing inward so they don’t unravel while baking. Give as much space from the pan edge to the first roll as there is between the rolls themselves so those outside rolls can expand in all directions.
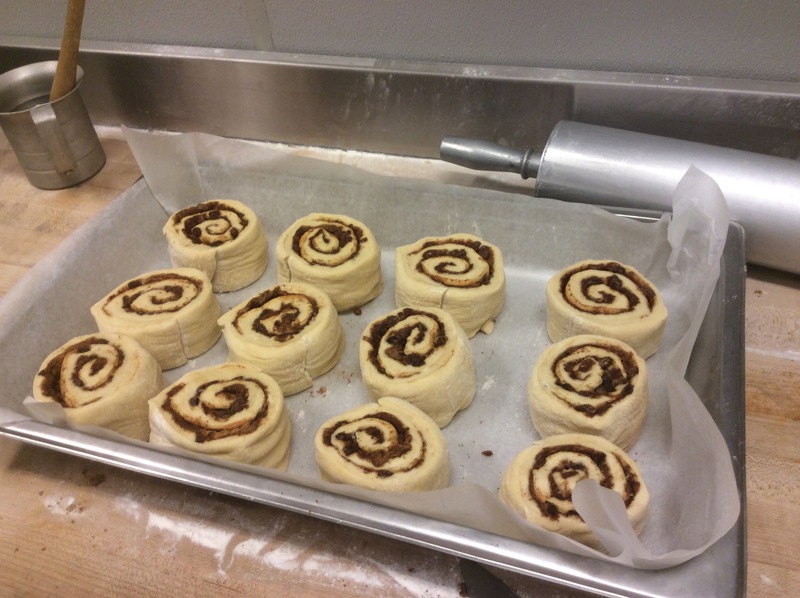
Yes, the rolls will be rather tall; once you’ve laid all the rolls out, press them down slightly so they’re a bit more squat; there will still be a fair bit of space between each that will vanish during the proofing. Cover the pan(s) with plastic and let proof until the rolls are expanded and very compact. This should be about 1 to 1½ hours at a warm room temp, longer if your kitchen is cool.
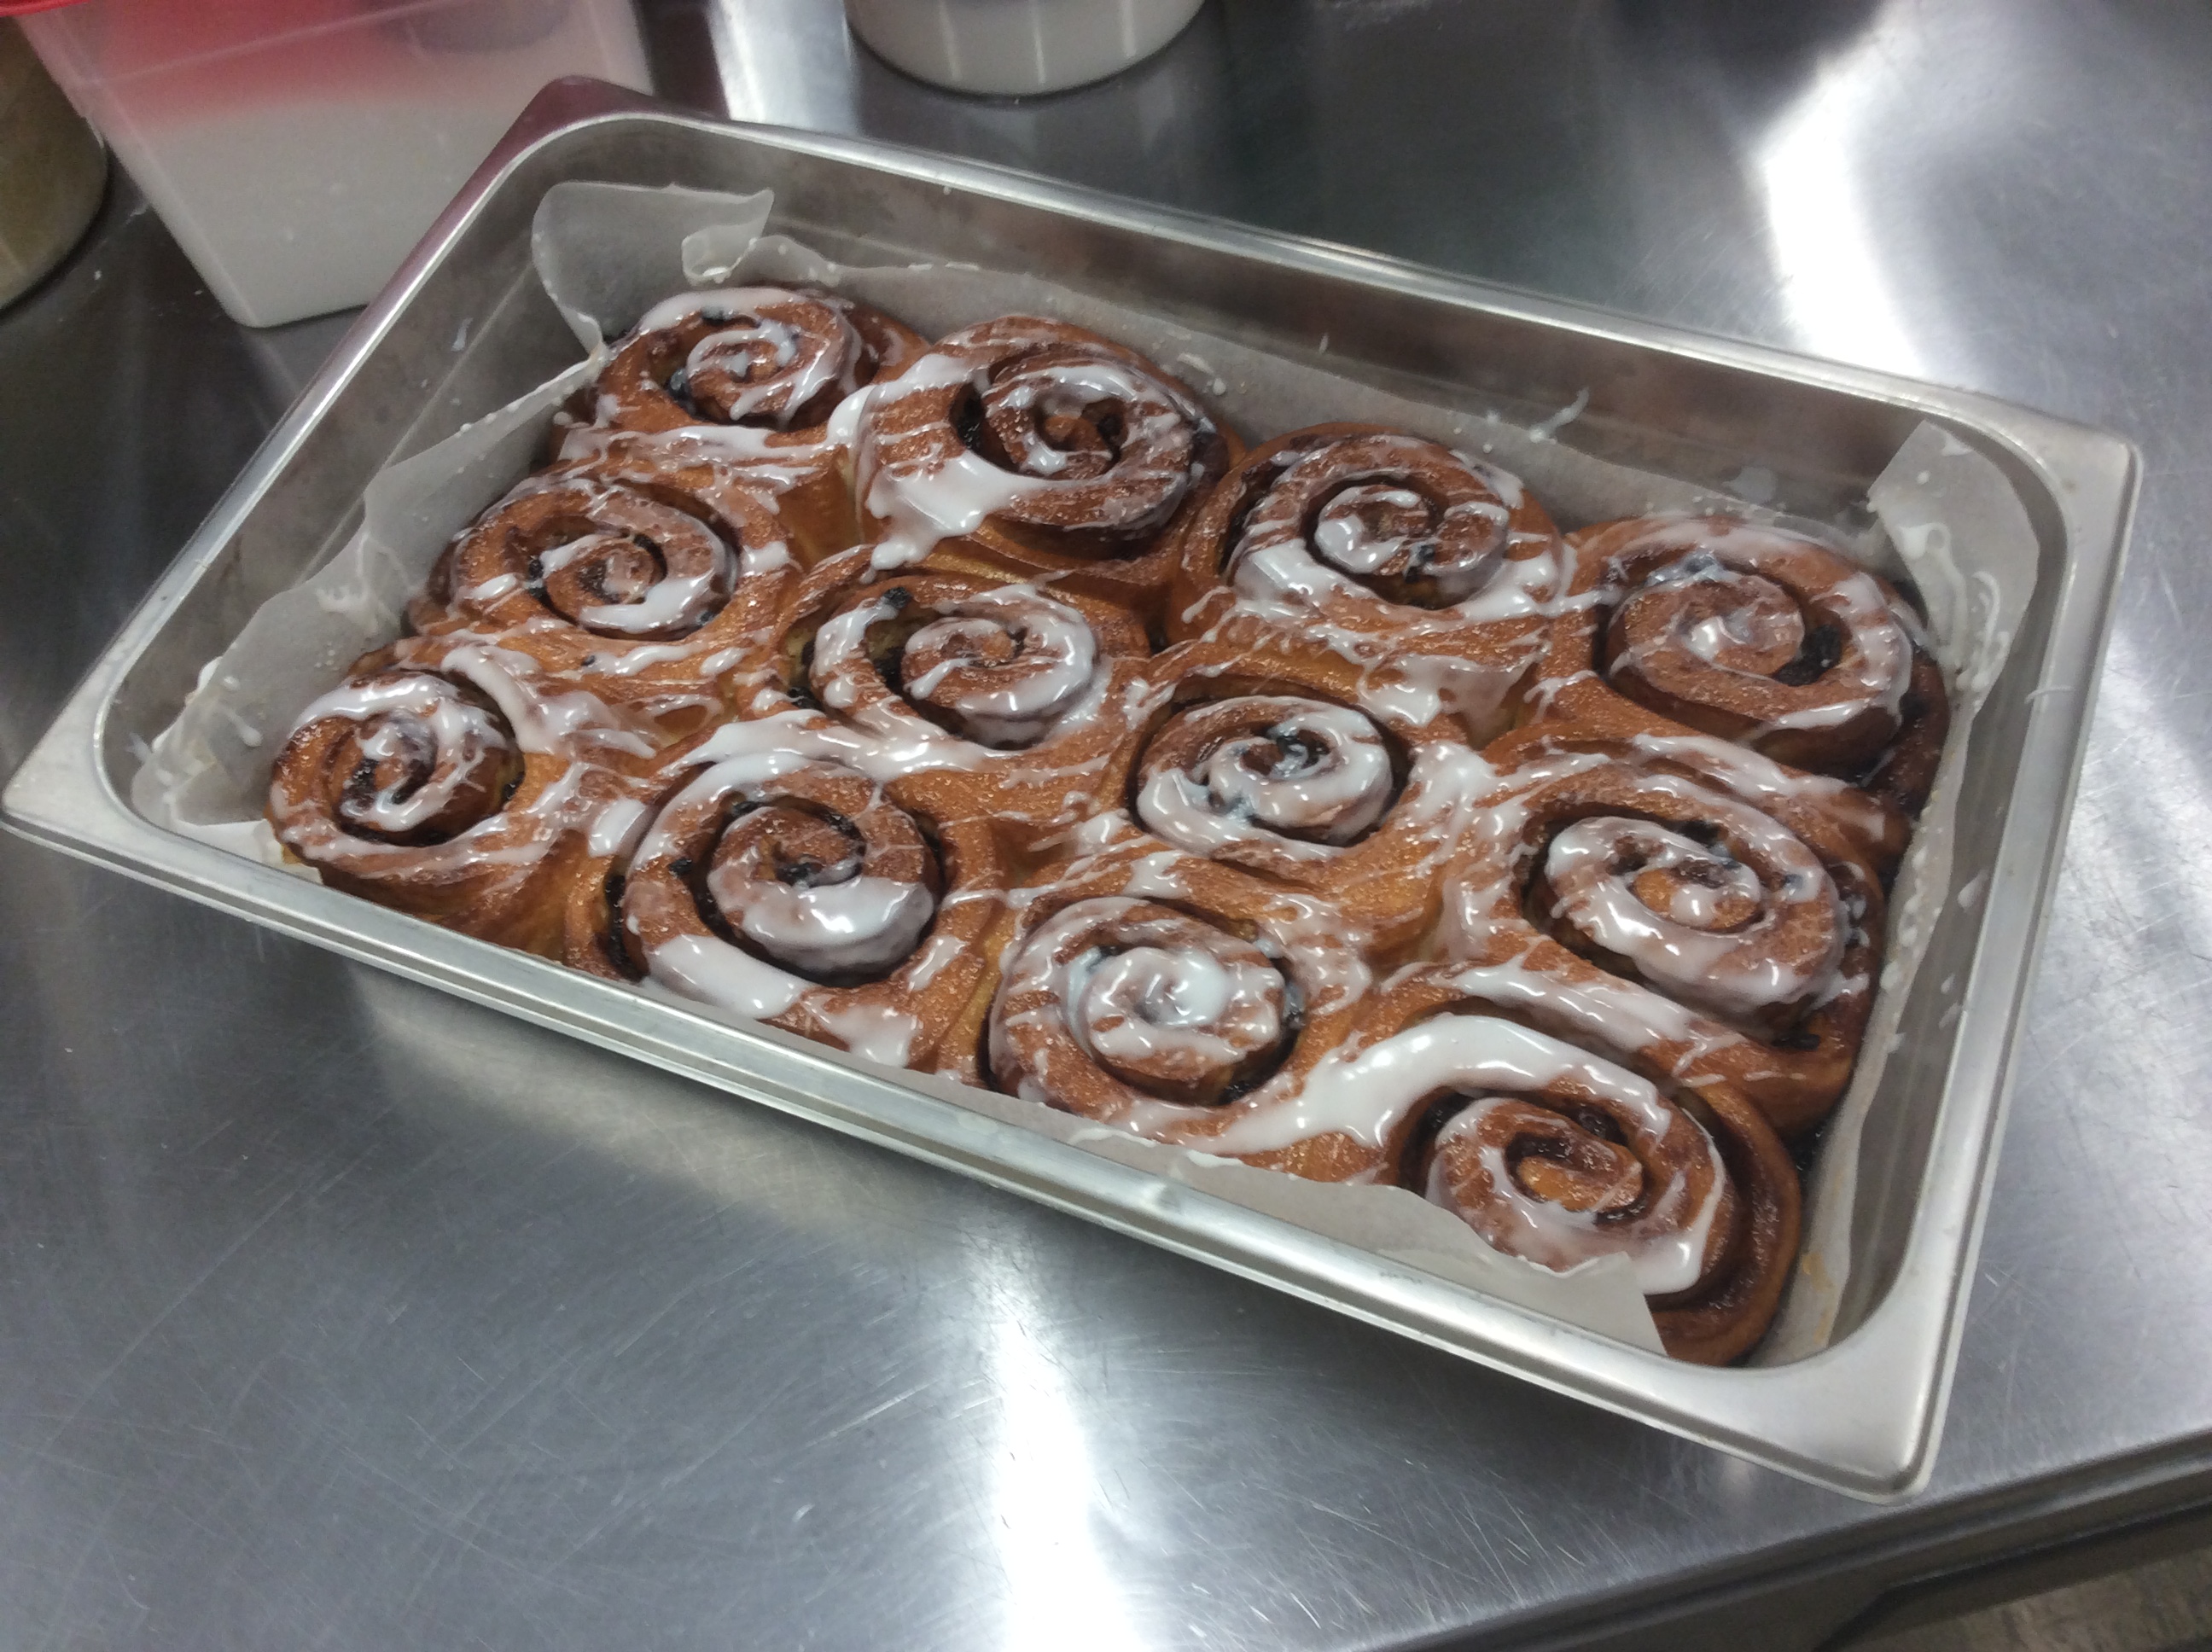
Preheat the oven to 330ºF about 20 minutes before baking. Bake the proofed cinnamon buns for about 18 – 22 minutes until they’re nicely golden brown. Brush them completely (including exposed sides) with glazing jelly right away to avoid drying up and giving it all a nice sheen.
Let them cool for a while and then drizzle or smear your favourite icing on top. Some people like a simple icing sugar-and-milk drizzle, some a cinnamon or lemony icing, others go for more decadent cream cheese icing; it’s up to you and your taste buds.
Serve and enjoy the smiles. These cinnamon buns are best eaten on the day they’re made. They can, if a full batch is too many, be frozen once cooled (before icing) then thawed and warmed up in a 325ºF oven.
The Basic Sweet Dough recipe shown above is good for more than just cinnamon buns. Tea Rings, Russian Braid are just a couple of variations you can make with this same basic process.