Tired of having your baked goods stick to your pans? Are you frustrated with cakes, panned breads and cinnamon rolls ruined because they rip out, leaving half of it glued to the bottom of your loaf pan? Then this is the solution just for you!
And no, there’s NOTHING being sold here! Billy Mays is not being channeled. This is just a handy tip for all you bakers out there.
As noted in a recent post on Banana Bread that came out – or rather didn’t – of a loaf pan, here’s the excessively simple Pan Release recipe that a lot of pro bakers use.
Don’t blink or you’ll miss it, it really IS that simple!
Ingredients:
- one part flour (by volume)
- one part vegetable oil
- one part vegetable shortening.


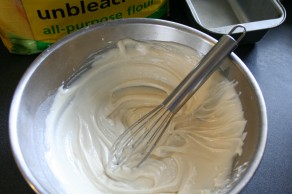
Place all three ingredients in a bowl and mix (by hand or with mixer) until smooth.
Yup, that’s it!
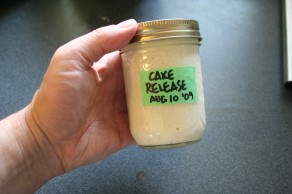
Now, put this in a lidded container and use a pastry brush to apply to your pans (cake, bread, whatever). Your fingers or a bit of paper towel will also do if a pastry brush isn’t handy, they’re also easier to clean.
This can be stored at room temp in the cupboard, lasts for 6 months.
How much to make? For the pint jar above, I used a 1/3 cup measures. I measured the flour, then the oil then the Crisco shortening (which dropped out of the now oiled cup easily). If you don’t do a lot of pan baking, try 1/4 cup of each. Total cost for that jar full: maybe 20-25¢? So even if you only use half, toss out leftovers and make a new (smaller) batch in 6 months, it’s still insanely cheap.
This is not only easy to make but a lot less costly than commercial stuff and without questionable additives (did you know some spay oils use propane as their propellants?).
The pro bakers swear by this stuff. Obviously this won’t replace spray oil when you need to mist a loaf but for keeping baked things non-stick, it’s great and a lot simpler (and less messy) than greasing and flouring. I use it to grease baking pans but also for the proofing bowls.
I have never, ever had anything stick when I use it. And it’s what I use when I want to be sure even the stickiest stuff doesn’t glue itself to my coated pans; commercial spray oil can build up on those and become gummy.
So give it a shot, if you bake you probably have all the ingredients already. Then come back and let everyone know if it worked well for you.


Yep, I am one of those “pro” bakers and I swear by this stuff! (mind you, I make it with 2 cups of each at a time LOL) I use a silicone pastry brush and it works like a dream!
Hey Mel!
Thanks for dropping in!!
See, I told you the pros use it and like it!
Check out Mel’s cake decorating website, WildCakes.ca!
Another way I found is if you freeze a marble slab and line your pan with foil, then when its done put the foil and pan cake onto the slab and as if by magic the cake easily lifts off the foil.
That’s a really good idea.
I’ve been a duster so long I haven’t thought about other alternatives.
Thanks,
ct 😉
Come back and report your results if you decide to make and use up a batch!
Hi,
how can I replace the vegetable shortening? I’m not sure we have anything like Crisco here in Germany.
I’m really not sure what would be available to you there. Usual replacements for vegetable shortening, for example in pie crusts, are lard or butter but neither will have the shelf life you want and will go rancid very quickly, aside from bringing along quite different flavours. I’d suggest trying to locate a baking resource in Germany and asking for a recommendation there, it’s very likely they’ve run across the “What to replace shortening with” question before.
Or shoot a note to fellow BBA Challenger Daniel as he’s in Germany also. He’s posted a few comments here, one under the pizza topic. You could also post in the Challenge’s Google Group board, I know there are at least a couple of people who’d be able to come up with a suggestion there.
I love this! I use it all of the time!
I tried this on a particularly stubborn set of cake pans. (They’re the only ones I have, therefore I have to make it work.) I don’t know what I did wrong, but my results were not any different, and I really wanted them to be! How thick to you brush it on?
A generous coating without being excessive.
Alternative: If this alone doesn’t work, consider using it with parchment paper. Trace the outsides of the pans in pencil on some parchment and cut the circles out (a wee bit smaller than your traced circle since they need to fit INSIDE the pans). When you use the cake pans, spread your release then put the parchment paper down so it sticks in. If needed, also put a band of parchment around the sides. When your cake is done, you can actually wash the parchment paper and re-use it many times.
OMG I just made some and it worked like a charm!
Thanks for posting this 🙂
My husband worked in a bakery in the 1950s, where he slathered this over many cookie sheets and bread pans, suggested this to me many years ago and I have been using it ever since. However, I keep it in the refrigerator. It does not harden up and works great and keeps for a loooooong time! It works especially well for bundt pans with all those indentations. Have to be careful when removing the pan, because the cake almost falls out.