Sourdough Starter, Day Six: Breakfast of Champions

Intro • Day 1 • Day 2 • Day 3 • Day 4 • Day 5[Day 6] • Day 7 • Final Thoughts • Day 15

Day 6:

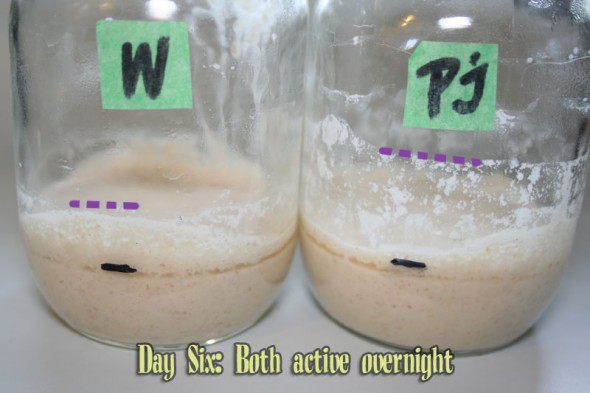
2009_08_17BothGrow

After yesterday’s feed. the starters both began to expand (up to the purple line) Wally had a pretty good rise this time, too; he seems to be catching up quite well. We may be just one or two feeds away from finishing the project. PJ is clearly well under way.

Both starters were pretty much done expanding within three or four hours before they started to collapse. This means they went for the remaining 20 or so hours “unfed”. They had, in effect, chomped through whatever food they were going to in rather short order. You can even see in the photo a very slight layer of liquid on top of the starter. This is “hootch” and it’s a normal byproduct of our friend the Lactobacillus sanfranciscensis when a starter is ‘hungry’. The solution? Feed it.

Since the amount of fresh food the starter has been getting is at a ratio of 2:1:1, we know that this is a rather slim buffet. Once again, let’s look at the weight to see what that means. Continue reading “Sourdough Starter, Day Six: Breakfast of Champions”

Sourdough Starter, Day Seven: The Kids are All Growed Up

Intro • Day 1 • Day 2 • Day 3 • Day 4 • Day 5 • Day 6[Day 7] • Final Thoughts • Day 15

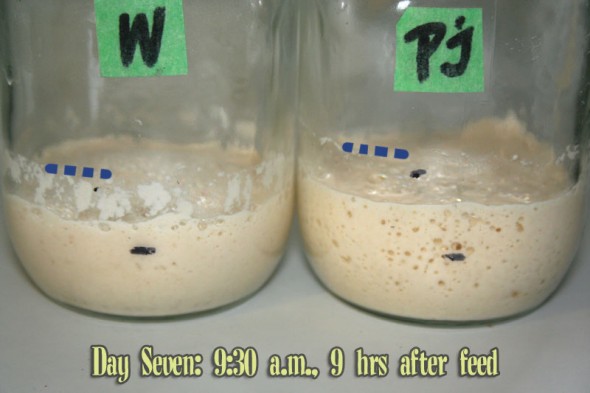
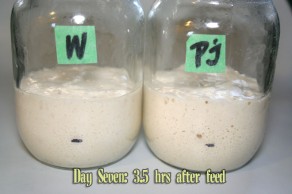
Here we are at Day Seven, just a tad past 7 a.m., last day of the one week run (although we technically don’t start day 7 until 3pm and we’re therefore in the tail end of day 6) and our starters are hungry.

2009_08_18Morning

After getting fed late last night (1 a.m.) we see they both rose to nearly the same level (blue line) and a bit more than double. At this point they’ve begun to recede so we give them another 1:1:1 [S:W:F] ratio feeding. Continue reading “Sourdough Starter, Day Seven: The Kids are All Growed Up”

Starting a Starter: Final Thoughts

Intro • Day 1 • Day 2 • Day 3 • Day 4 • Day 5 • Day 6 • Day 7[Final Thoughts] • Day 15

2009_08_18-3.5AfterWell, it has to happen. You look after them while they are just young and then one day, before you know it, they’re all grown up and ready to go off on their own, do what they are meant to do. Sure, they may not behave perfectly, may disappoint now and again but deep down, you gave them the best start you could and you know with a little care and a good environment, they’ll do great things. And you’ll be proud to say “Those are my babies.”

The main goal of the project was to not only offer a step-by-step of building a sourdough starter but to compare two similar recipes: one using water, the other pineapple juice. Having done just that and getting both starters to the “finish line”, here are some conclusions. Continue reading “Starting a Starter: Final Thoughts”

Home-made Pan Release recipe

Tired of having your baked goods stick to your pans? Are you frustrated with cakes, panned breads and cinnamon rolls ruined because they rip out, leaving half of it glued to the bottom of your loaf pan? Then this is the solution just for you!

And no, there’s NOTHING being sold here! Billy Mays is not being channeled. This is just a handy tip for all you bakers out there.

As noted in a recent post on Banana Bread that came out – or rather didn’t – of a loaf pan, here’s the excessively simple Pan Release recipe that a lot of pro bakers use.

Don’t blink or you’ll miss it, it really IS that simple!

Ingredients:

  • one part flour (by volume)
  • one part vegetable oil
  • one part vegetable shortening.

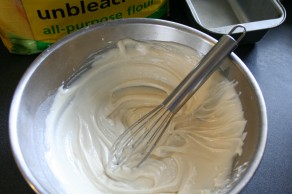
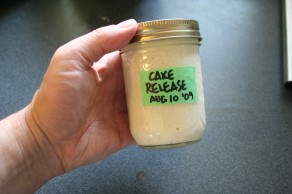
CakeRelease1 CakeRelease2

Pin It

Place all three ingredients in a bowl and mix (by hand or with mixer) until smooth.

Yup, that’s it!
Now, put this in a lidded container and use a pastry brush to apply to your pans (cake, bread, whatever). Your fingers or a bit of paper towel will also do if a pastry brush isn’t handy, they’re also easier to clean.

This can be stored at room temp in the cupboard, lasts for 6 months.

How much to make? For the pint jar above, I used a 1/3 cup measures. I measured the flour, then the oil then the Crisco shortening (which dropped out of the now oiled cup easily). If you don’t do a lot of pan baking, try 1/4 cup of each. Total cost for that jar full: maybe 20-25¢? So even if you only use half, toss out leftovers and make a new (smaller) batch in 6 months, it’s still insanely cheap.

This is not only easy to make but a lot less costly than commercial stuff and without questionable additives (did you know some spay oils use propane as their propellants?).

The pro bakers swear by this stuff. Obviously this won’t replace spray oil when you need to mist a loaf but for keeping baked things non-stick, it’s great and a lot simpler (and less messy) than greasing and flouring. I use it to grease baking pans but also for the proofing bowls.

I have never, ever had anything stick when I use it. And it’s what I use when I want to be sure even the stickiest stuff doesn’t glue itself to my coated pans; commercial spray oil can build up on those and become gummy.

So give it a shot, if you bake you probably have all the ingredients already. Then come back and let everyone know if it worked well for you.
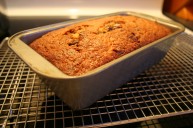
10 Minute Nanner Loaf

10 Minute Banana LoafThere’s something odd about this. No, not this particular bread but the situation around it. You see, Punkin hates bananas but LUUUVVVVS banana bread. So it’s a rare occasion when I do buy bananas since I know they’re rather disliked. A lot. I’m told it’s the texture and/or the smell. And some excuse about humans having evolved passed them… or something. I’m sure he’s joking. (I think.)  Hey, I can live without bananas if it will keep Punkin happy.

So this week, I decided to pick up some bananas because I just had a hankering. However, I bought five that were, well, riper than I was expecting, I wanted to put them on cereal or in a PB&B sammich but they decided to go brown on me rather soon. No prob! Because there’s a great Banana Bread Recipe online over at the Fresh Loaf. I’ve made it before and, in spite of finding bananas gross, Punkin will eat this bread up like nobody’s business.

I don’t ask. Cause I have even more “I don’t likes” myself (I blame it on my mother’s terrible cooking skills) so it’s a decent trade off from my end. No green peppers on my stuff, no nanners in the house, 99% of the time. And usually when they do make it past the front door, some Nanner Bread comes out of the deal. Like now.

As it’s been a long while since I made it and I’ve never done a Step-By-Step of the process, I figured this was a good time to do so. Go grab the recipe linked above (there’s a “printer friendly” link near the bottom) and follow along. If you happen to have two or three ripe nanners at hand, it’s a seriously quick bread so you could probably mix it up as I go. Seriously, the “10 minute” claim isn’t off the mark (unless you’re also taking photos and need to make the process somewhat presentable. Then it may take 15.

Oh and in case anyone’s wondering, this isn’t part of the BBA Challenge, just a little side trip.

Continue reading “10 Minute Nanner Loaf”