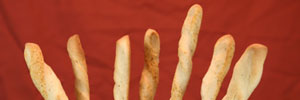
 Here we are in mid-May and this is already the third and last of the May Challenge breads to do in the MellowBakers group bake. And this one is way easy! With just a mix and knead of the dough then a one hour proofing the biggest concern here is: what to put IN the bread.
Grissini, as noted in a previous post Mambo Italiano, is the Italian term for bread sticks. Yep, plain ol’ bread sticks. Except not like the stuff you get in a box from the grocery store. Oh no. These are wonderful little invitations for creativity. Sure, you could make them just plain or with a little salt and sesame seed. But you’ve got your whole spice cupboard – and more – to toss into the mix here so why not get creative?
Now unlike other blog entries here, I sort of did this one very much on the spur of the moment so we’re going to miss the first couple of steps but you’ll probably not miss them this time around. Because these are SO EASY TO MAKE!
As the book offers a couple of variations on the “plain” version which can then be topped with seasoning of choice or include tasty flavours like cheese or roasted garlic right in the dough, I jumped on this last one and tossed in two cloves of roasted garlic I keep in the freezer for just such uses. I also dumped all of our remaining Parmesan into the mix which was a little short of the 51 grams the book suggests.
OK, just because this is probably one of the EASIEST recipes you can make and I do want people to get into making bread and not just reading about it, I’m going to include the recipe on this one. This is going to be rare since we don’t add the recipes from the book – I’m not going to reprint the whole thing, after all – but if you do have Hamelman’s book [easyazon-link asin=”0471168572″]Bread: A Baker’s Book of Techniques and Recipes[/easyazon-link], you’ll find this on page 256. Here’s my slightly modified version of it; this will give you 24 bread sticks.
Bread flour: 506 g (17.9 oz)
Water: 263 g (9.3 oz)
Olive oil: 59 g (5 T)
Butter: 51 g (3 1/2 T)
Salt: 11 g (2 tsp)
Yeast: 5 g (1 1/8 tsp)
By the way, those “ounces” are by WEIGHT, not measuring cup ounces so use your kitchen scale. Those following along in your own book may note the increased yeast I’ve included here; this is actually a correction by Mr Hamelman to the incorrect amount printed in the book. So you’ll want to get your pencil out and fix that.
OK, as noted, I did this on a whim, last second thing, so I have no Mis en Place photo for this recipe. Basically, you put everything in a bowl at one, then mix.
I also mashed the afore-mentioned two (chunky) roasted garlic cloves (the book says use just one for the 24 stick Home version but there’s been reports of vampires in the area so I chose to up that) and added the Parmesan into the dough. Then I ground a goodly amount of black pepper into the mix, because I like black pepper. Don’t ask how much, I just added until I stopped. It could have done with more but I was sharing these.
I also happen to have about a half cup of excess sourdough starter hanging around so I weighed it (110 g) and, knowing it was half water and half flour by weight, reduced the water and flour in the list above by 55 g each. This was added simply because I wanted to do something useful with the excess sourdough. It was the reason I decided to “whip something up” that day, I’m not saying you need to add any to yours. Be sure to add “Grissini” to your list of “What to make with excess starter”.
Then it was just a matter of mixing all of these ingredients and kneading. Using the stand mixer, I mixed with the paddle at speed 1 for about 2 minutes until everything was together nicely then switched to the dough hook for about 3 to 4 minutes to knead. Well, that was hard.
Cover the bowl with plastic wrap or your handy dandy disposable shower cap and let proof for an hour. Preheat the oven to 380ºF when you have about 15 -20 minutes to go (baking stone not required).
Woohoo! At this point I got the lights and camera out and took some shots.
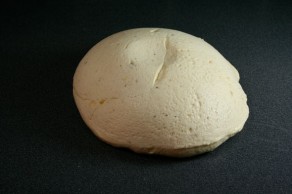
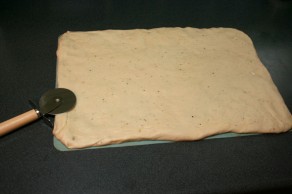
So one bulk proofed, I dump the dough onto the counter. I then picked it back up and put a cheap silicone mat underneath since I was about to slice it. I pushed and prodded the ball into a rectangle which magically happened to be the size of the mat. Amazing! I guess I could have rolled it out with a rolling pin but that adds more stuff to clean up.
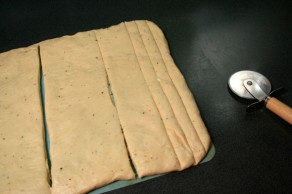
So the next step is to slice this sheet into 24 reasonably even ropes. How to get them relatively even? Easy. Using your handy pizza wheel, slice the rectangle in two – eyeballing is fine but measure if you must. Each half will give you 12 ropes. Now slice each half in two, giving you four pieces; each quarter in two, then each eigth in three ropes. Simple, no?
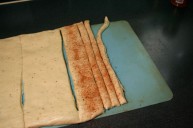
Now it’s simply a matter of transferring each rope to your baking pans. You can roll the ropes into or sprinkle on more spices, cheese or seed of choice here although mine were already pretty loaded.
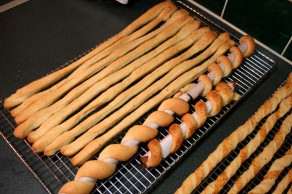
I stretched each of them to fit the long side of the pan, putting 12 to each pan. I also twirled the dough but that wasn’t showing up too well, so I added some extra spices to a section or two so the effect would be more obvious. You’ll see in a bit.

I continued with this until I had most of the bread sticks done, some plain, some twisty and spicy.
Then I got to one of the ideas I’d been toying with for a bit (in my head) when Natashya, a fellow MellowBaker, let us know that she was hosting Bread Baking Day for May and had selected “Twisted Breads” as the topic. This would be an awesome way to combine both the Mellow Bakers Grissini and the Twisted bread themes.
So naturally, I went digging into the plumbing supplies.
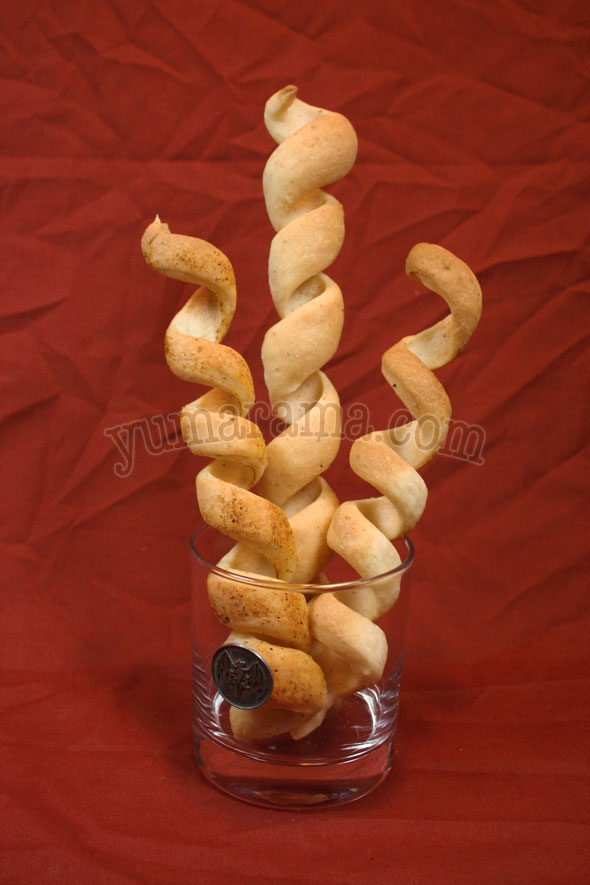
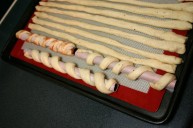 I found three small leftover ends of copper pipe, just what I was looking for. Gave them a bit of a wash, then wrapped a little parchment paper around each – didn’t take much. Then, using the last three dough ropes, I wrapped each around one of the pipes. And there they are, ready to go into the oven, now well pre-heated.
Both pans went in for the expected 20 minutes but at that point they still seemed a little pale so I let them stay a few minutes more until they were a bit more golden.
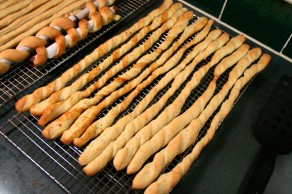
On the left we see the “twirrled’ dough with and without the added spice – I used my home made version of Emeril’s Essence – which shows the effect a little better. On the right are the plain stretched bread sticks and the twisted pipe version. With a little more trials, I coudl play with the way those were wrapped and get some interesting funky looks.
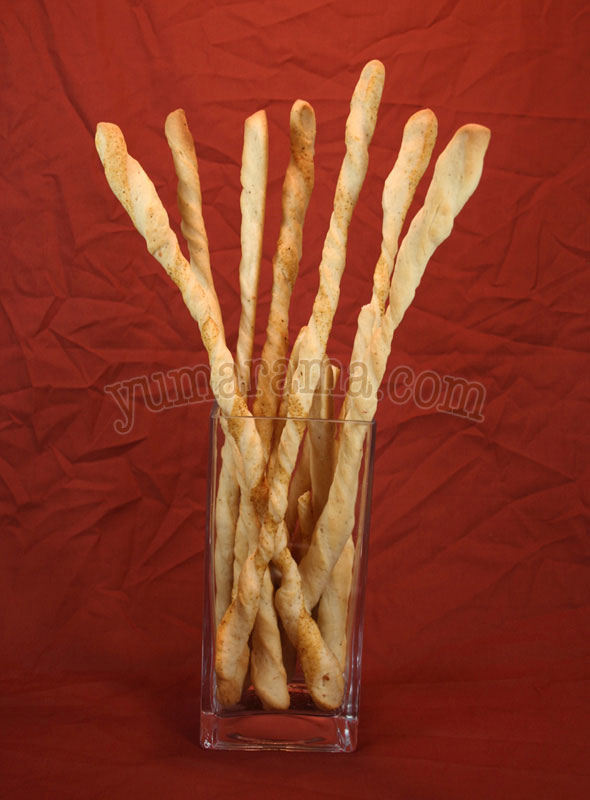
And now, the “glamour shots”:
OK, so they look quite pretty but what’s the verdict on the taste?
Yummy!! What’s not to like: tasty, garlicky with a nice kick of Parmesan. Only thing I’d want to do next time is sprinkle a little coarse salt on the outside before baking.
And try different flavour combinations; it would be simple enough to keep the dough plain then add different flavours to it after it’s been kneaded. Possible ideas include rosemary, caraway, mixed herbs like Provencal, a little hot pepper for kick… Someone on MellowBakers also suggested going with sweet, like cinnamon sugar, and make it a desert bread to go with ice cream. Or lemon or… Your spice cupboard and your imagination are really the only limit.
So there you go, an easy and fast bread to make, great tasting and can be made in a variety of flavours and shapes – I’ve already come up with a couple more ideas for cool shapes.
Total awesomeness. So go make some already!
This tasty bread has been submitted to YeastSpotting.


Excellent! I had not noticed the spice curl until now. Lots of creativity.
I definitely agree about the salt being added, but then I love pretzels!
The ones that you wrapped around copper came out beautifully. Great photo.
I have not seen any vampires around my house for a long, long time.
Wow, they look great! I’m trying to brainstorm alternatives to the piping . . . the twisty ones are so cool, but I’m not sure I have extra piping hanging out at my house . . . .
.-= Abby’s latest blog post: Mellow Bakers: Corn Bread (May) =-.
Damn those look good! beautiful photos Paul!
Love the glam shots. I thought about the salt, but worried they would get soggy.
.-= Anne Marie’s latest blog post: Blueberry Crumb Muffins =-.
I’m in love with the curly bread sticks!! Thanks so much for sharing the recipe and for the glam photo shot ~
I absolutely love them! Yay for corkscrew grissini!
Very creative. Thanks so much for doing the twist with us for Bread Baking Day!
I envy you. If I have just one calorie I blow up like a balloon. You can eat a million and you’re just as svelte as a teen.
They look delicious and fun to make.
The twisted sticks look AWESOME! May I tell you a secret, Paul? I also made twisted grissini for the BBD, but they turned out awful, so I didn’t submit them and opted for something else. So funny!!!
.-= ap269’s latest blog post: Mellow Bakers May 2010: (2) Corn Bread =-.
That’s so creative and very pretty. And I’m loving your glam shots.;-)
.-= Oggi’s latest blog post: Crispy Pig Tails =-.
The garlic and parmesan sound great, and I love the curly grissini! I’m going to find some pieces of pipe or dowels or something so I can try this!
.-= lisaiscooking’s latest blog post: Seared Salmon on Coconut Spinach =-.
The twisted grissini look so great! Now I need some piping to try them by my own 😀
.-= Stefanie’s latest blog post: Dinnete =-.
They look delicious! Great photos, thanks for posting!
How creative of you to think of using pipes and wrapping them in parchment paper! These gressini are the prettiest ones I ever saw.
Your grissini made me jealous… I did not do a good job at all with mine, but your creative shaping makes me want to try them again
for us, that recipe was a little disappointing, pretty bland.
Great job, Paul!
Sally,
Sorry yours didn’t turn out as you wanted. I’d agree the recipe base is bland, that’s where the added toppings/spices/salted tops have to come in, I think. The ones I sprinkled with “Emeril’s Essence” were actually rather nice. These little things do need a boost in the flavour department.
And going lightly seems to not quite make it. Perhaps seeding with sesame or poppy would be adequate but I want a good “punch” on mine so next time, definitely sprinkling with kosher salt (enough to give is zip) or making suer there’s a nice coating of good flavour or embed really potent herbs & spice.
On their own, plain and simple, not impressive. Gotta be vehicles.
That really is a great idea, and looks so much better than the usual, actually even looks more tasty!