

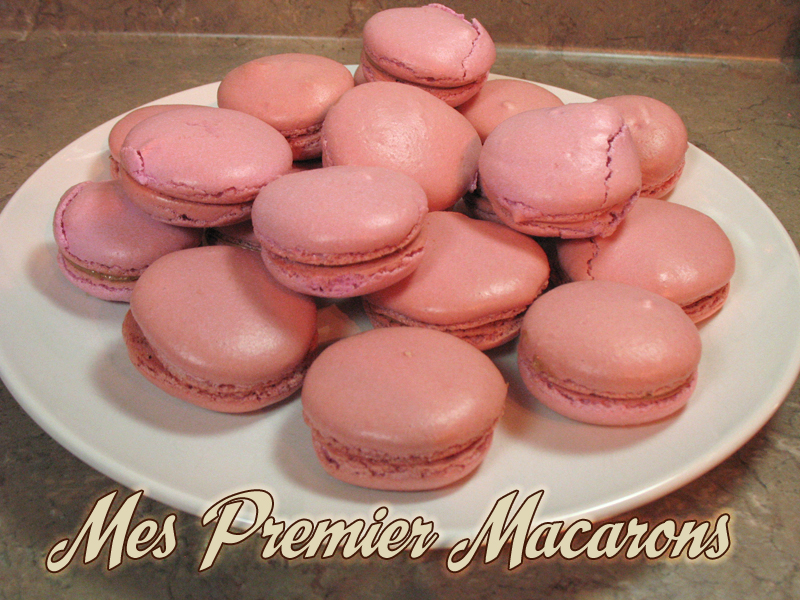
At last, we’ve gathered up the courage to make macarons, these delightful little meringue-based almond cookies that are currently extremely de rigeur in the classiest of places. Reading up on them, however, may made you a little daunted because of the aura of finickiness that seems to be placed around their construction.
Fear not, for there are a few things you can learn that will make creating macarons much simpler than is usually shown.

This is the third part of a series showing how I made my very first batch of Macarons. Previous entries were:
Making Swiss Meringue Buttercream (great for cookies or cake)
Making Almond Flour
The following pictorial step-by-step is based on the macaron recipe found on the awesome blog BraveTart.com where pastry chef Stella Parks guides you through the process, eliminating much of the hocus-pocus typically associated with making these cookies. Her view, basically, is this: They’re just cookies. Yes, there are steps peculiar to this style of cookies, but there are specific steps for many other cookies too and this doesn’t elevate them to near-ritualistic requirements.
As noted in a prior post, two things you will want to read – and possibly print out – before we get too far ahead are:
- The Ten Macaron Commandments
- Ten Macaron Myths Busted
Some of the things we’re told we can be less fussy about: perfectly aged egg whites and their temperature, drying the piped cookies, drying the almond flour, using cornstarch-free powdered sugar, being super-duper careful with the meringue. Let’s just follow Stella’s simple recipe and get us some nice macarons, shall we?
 You may also want to print out this template I made for piping out macarons in either PDF format or as a PNG image. It will fit a typical (US) home sized baking pan of 16″ x 10″ under a silpat type silicone liner or parchment paper.
Simply print out TWO copies at full (US 8.5″ x 11″) page size, tape the open ends together and trim. Each baking sheet will then give you a total of 32 circles (for 16 finished cookies), optimized for the standard macaron size of 3.5 cm with 2 cm space between each. Just remember to pull it out from under your parchment or silpat before putting your piped macarons in the oven!
Alright, let’s gather our ingredients and make some macarons!

Our Macaron Ingredients
The following should be enough to make about 40 finished cookies, so 80 macaron disks.
| Ingredient | Grams | Ounces |
| Almond flour (see here), a mix of ground almonds and confectioner’s sugar | 345g | 12 oz |
| Egg whites, fresh or aged, from actual eggs (5 large) or carton, doesn’t matter |
144g | 5 oz |
| White Sugar | 72g | 2.5 oz |
| Vanilla extract OR… | 8g | 2 tsp |
| Vanila bean scraping | ||
| Salt | 2g | .3 tsp |
Equipment:
- At least two 16″ x 10″ sheet pans with silpat liners or parchment
- Large piping bag with plain round tip
- A stand mixer (preferrably)
Preheat the oven to 300 F (150 C)
Macarons Directions
The following is based on the recipe posted on the BraveTart site; the main difference here is simply the inclusion of step-by-step photos. This recipe forgoes many of the usual “tricky bits” of making macarons.


Put your egg whites, sugar, salt and, if using, the scrapings of a vanilla bean (don’t add any extract yet) into your mixer’s bowl. Using the whip attachment, whip this mixture for 3 minutes at speed 4 on Kitchenaid (med low otherwise). At the end of the 3 minutes, the resulting mix won’t look like it’s done much, which is correct.

Increase the speed to 7 and whip for another 3 minutes, then up again to speed 8 for 3 minutes more. Stop the mixer. The resulting mix will now look like proper, rather stiff meringue. Scrape the sides of the bowl with a spatula.
At this point, add any flavour extracts and, if used, colouring of choice. I use AmeriColor Soft Gel Paste, available at good baking supply stores or online. Wilton brand would work as well, available at Michaels Craft Stores. Last choice would be grocery store colours as they are very “wet” and not terribly concentrated and therefore may add unwanted moisture to your meringue.

Now give your meringue a good whipping at top speed (10) for a minute to get all the colour ad flavour dispersed and get that meringue good and stiff. When you lift the whisk from the meringue, there should be a big glob of meringue stuck in the center; you can knock that out by tapping the whisk on the bowl’s side. If there is NOT a glob in the middle, your meringue is still too soft. Give it another minute at top speed. Check the stiffness again.

Once the meringue is the right stiffness, dump in all your dry ingredients at once. The next stage is part of the “hocus-pocus”…
The Macaronage
Fold the dry ingredients into your meringue using a rubber spatula. For the uninitiated, “Folding” means scooping from the bottom and in a smooth sweep, dropping the results on top. It is a smooth, rhythmic motion: dip deep down, smooth stroke up (along the side of the bowl) flip spatula over when you come up, dropping the bottom stuff on top; give the bowl a 1/6 turn, repeat. The pont in this motion is (normally) to gently mix the ingredients into the meringue without beating out all the air you meticulously added while whipping.
Except with macaronage, we DO want to deflate the meringue a little bit.
So we change the motion a bit: We scoop in, gently scrape along the bowl’s side as we move up, dump the scoop on top, then press that spatula down onto what we just brought up, squishing it onto the side of the bowl. This last extra move will knock a wee bit of the air out of the stiff meringue. We’re still gently incorporating the dry stuff into the meringue but adding a small bit of controlled deflation.


You’ll start with what looks like a big mess and eventually end up with a slightly glossy, softer but still a bit stiff batter. To get there, do the following:
Count your scoops. As you reach scoop 25, stop. Take a little of the batter and drop it down onto the rest. You are now going to watch what happens in the next several seconds. If it stays where you dropped it and never incorporates back in, it is still too stiff.
Give it another two scoops, then check again. At some point, likely 15 extra scoops, you will note that the glob you drop back down stays up but in a few seconds begins to “melt” back into the remainder. After 15-20 seconds, it should have levelled out considerably, yet still be a soft blob. You need to check like this for the first few times you make macarons only, by then tyou’ll start getting the “feel” and know when it’s done.
If you go too fast and too far, your batter will become too soft, the glob you drop back will almost immediately smooth itself out to invisibility. At this point, you’ve lost the game, you’ve deflated the meringue too much. Start over from scratch; this will not make macarons.
See the photo on the right above? I went a tad too far here and passed the “perfect point” by a couple of extra scoops. Not so bas as to be unusable but I would have been better off holding back a bit earlier. On my next batch, I did much better.
BTW: In case it’s not clear, I’m doing this step-by-step on my own First Ever Attempt, so you get to see me making mistakes and, hopefully, this will help you avoid too many of your own. However, I contend that doing everything perfectly the first (few) time(s) is a bad way to go – you learn a LOT by making mistakes.
The goal here is to get a batter that is the right consistency so you don’t have it running out of your piping bag and/or once piped in your little circles, spreading out into flat puddles. Your circles need enough body to maintain some height yet soft enough that the peaks will level out slightly after about 20 seconds.
Piping Macarons
OK, so your batter is at the right consistency (or close to), now it’s time to make your little meringue disks.
Fill a large piping bag bit more than half-full. You don’t want to fill to much or the bag becomes hard to handle and the pressure you get is difficult to control. The tip should be a large, plain round tip.
Slip your template sheet under your parchment or silpat liner on a baking tray and let’s start piping. The circle size should be about 3.5 cm (a smidge under 1.5 inches), and spaced 2 cm apart (a hair more than 3/4 inch). The template shown at top is designed to get the most cookies out of a standard North American home baking pan. You will want to maintain your piped circles a fraction inside the actual circle as the meringue will spread a little after you’ve piped it.

Above is my original attempt to “eyeball” the size and placement (I made the template after this, for obvious reasons) and as you can see, there was a definite lack of continuity. I also didn’t get as many cookies as possible from each pan. My second batch, with template, were much more even sized and better distributed, getting 32 cookies where the tray on the right above got only 20, and the tray on left got 33 but much too close together.
Serious case of “Do as I say, not as I do”!
Once your circles have been piped out, take the tray and, warning anyone nearby, give it a couple of good, hard smacks on the counter top. This will help to get those little “nipples” to disappear somewhat and also knock the bigger air bubbles out. Turn the tray 1/4 turn and give it a couple more smacks.
Baking the Macarons
Put the trays of macarons in the 300 F oven and bake for 16 – 18 minutes or until you can peel the parchment/liner away from a sacrifice macaron easily. If they come apart when you try to lift them, it needs more time.


Once they are baked, put the full trays on a rack and let the macarons cool completely. Lift off the macarons carefully, using a metal spatula if needed (metal spatula is good and thin).
The two trays of pink macarons from my very first attempt: one had mostly successes, the second had a lot of cracked shells. These were much too crowded. The two trays from my second attempt, below, were almost all good. They also rose up more with better “feet”.


 Note in this close-up that some of these cookies have a strange, dull looking raised spot on them. This is because I followed a small trick suggested on some macaron sites to finish up the piped disks and get rif of the remaining nipple “bump”: you use a wet finger to tap the little nub down. What this causes here, however, is a damp spot on the otherwise drier, slightly shiny cookie top and when baked, this spot gets a spongy look and rises a bit more than the shell around it. This is strictly a visual issue but one I would suggest not be done to the cookies. Improved piping skill and the right consistency plus good tray whacking should get rid of the little lumps.

Once all the cookies are baked and off the liners, start matching them as pairs based on size and prettiness. Even cracked, odd shaped cookies will taste great. The perfect ones can be for guests.
Fill your (cleaned up) piping bag with the filling of choice. Here I’ve used the milk chocolate Swiss buttercream I made previously. To one of each pairs of disks, apply a dollop of filling, about the size of a quarter and generously enough, then place the top on the cookie. In the sample above, I was just a little shy on the filing, not yet knowing if the buttercream would go far enough to do all the cookies. Which, obviously, it would have and this is how I know 2 cups of filling will do 40 filled cookies quite nicely.
Veronica, a blogger who attended a macaron class at Pierre Hermé in Paris (they have stopped giving these now) reported that their filling quantity is equal to the weight of the two cookie halves. If two shells weighed 11 grams, there should be 11 grams of filling. I didn’t weigh the shells so I have no idea what the average weight would be. Next time I make these, I’ll check that.


Paul, this is a fantastic primer on making macarons. I have never seen such detailed exacting instructions before. I am excited to try your method. Your comment about making mistakes really resonated with me. My little sister, who is a kindergarten teacher, tells her class repeatedly, “Mistakes are how we learn.”
Loving your blog Paul…I’m catching up and reading through it now…and since I’ve wanted to try macarons for a long time…this one is really perfect! Thanks so much for taking the time to do this so explicitly!
Hi
I am going to try your recipe after reading your instructions. Very pretty pics. I have tried quite a few recipes with various results, no feet, hollows but they have all been edible. I am seeking perfection. I would like to know if one could use powdered colours instead of gell colours? I know macarons are tricky and don’t want to spoil my efforts.
Many thanks.
Ros
Hi Ros,
I’ll state firstly that the recipe included on that post is not MY recipe but rather borrowed from BraveTart.com. That little bit cleared up, about the use of powdered colour: I would expect powder colours would be even less intrusive to the mix than the gel since the powder is even more pure (less gel!).
Best of luck with your next batch!
Paul
Hi Paul
Many thanks for your reply and I used Powder colouring. Macarons turned out very well indeed, my best efforts so far. At last I seem to be getting the hang of Macaronage and I feel more confidant.
Once again many thanks.
Ros Billson
Paul: Noticed that you eliminated the Powdered Sugar used in the BraveTart Recipe and used 12 oz of Almond Flour instead. I am just learning about the Macaron and have made a batch using Stella’s version with 4OZ Almond Meal and 8OZ P Sugar. Can you tell me why you chose to eliminate the P sugar ?
Oh sorry Paul… I see it now: you ground your own almonds and added the sugar there. Thanks
Hey, that was an easy one to answer! 😉
Glad you figured it out. Hope you give it a try and see how it works for you, then share the results.
What great instructions and photos. I agree completely about making mistakes along the way. I was certainly naive on my first attempt at macarons, thinking they were easy. And they are, once you’ve made them a few times. But I fully appreciate your photos and instructions. Now I’m off to finish baking mine LOL.
Hi,
I am making macarons for a school project, however we are not allowed to use any form of nuts (including almond meal). I was wondering if you knew of any alternatives that could be used in place of the almond flour? Thanks so much 🙂
Hi Charli,
No, I’m not familiar with any other sort of base from which to make macarons. Now that doesn’t mean there isn’t something you could try; I just haven’t seen anyone do that. Since it is primarily the egg whites and almond meal that makes the cookie, it could be possible to use some other slightly grainy meal as a substitute, perhaps a ground seed of some type might work. But the taste and the colour would obviously be different. The texture after baking could be quite different as well since I don’t know how the meal flour you select would react to a wet, whipped egg batter. The tiny almond bits, although they do absorb some of the moisture, won’t fall apart or go gummy where a wheat-based flour might introduce some gluten development. Almonds are also light in colour so don’t interfere with the addition of nice colours to the batter. So that’s two potential guidelines you might keep in mind when considering an alternative. What’s available in your region will also dictate what you will end up using.
It would need to be something you experiment with to see what the results are.
Here’s what I’d suggest:
Get a few meal-type flours, just a small amount of each, and mix up some with the whipped egg whites – perhaps adding a bit of colour to your meringue to see how the different meals take it – and just spoon them (don’t bother piping, this is only a test) onto a baking tray. Do just a few “cookies” from each one. Then bake as per instructions. If you find one that works out well, you have your new substitute. This way, you only need to test with a small amount of the different meals, can whip up just a bit of egg white, and can test them all in one go. And take photos as you go.
Once you’ve found something you thinks works well, please be sure to come back and tell us all what you went with and how your project was received.
Hi,
I wanted to ask about adding cream of tartar to the egg whites when making the meringue. Is it not recommended when making macarons?
Also, is it possible to cut back a bit on the sugar if you think the cookies are a little too sweet, or would that affect the batter?
Thanks!
Hi Mollie,
You may want to research the purpose of adding an acid (cream of tartar, lemon juice, white vinegar) to egg whites and decide if this is actually needed here. Basically, adding the acid helps to provide some stabilization which means the stiff egg whites won’t collapse as readily. If you feel that this is something you would benefit from, then give it a shot and see how it performs for you.
As for decreasing the sugar, of course you can do so but the sugar does help the foaming process. Sugar draws water out of the egg whites and so helps the foamed egg retain it’s stiffness. It also keeps the water from evaporating which allows the proteins, while baking, to set better.
These are all academic things that someone with a deeper understanding of the chemical actions between these acids and proteins might be better able to respond to. I’m not that guy. From my (certainly limited) understanding of the processes, I’d be willing only to say: give it a try and see if the results work for you. If they do, keep doing it. If not, go back to the standard processes. In either case, if you do try things out and find a marked result – whether it helps or hinders – it would be excellent to have you report back here so others can benefit from your shared experiences.
Até parece fácil vou tentar fazer usando esse método!
(It seems easy, I’m going to try using this method!)
I bake and sell macarons, been selling for a couple of years now. I love seeing people making them. Honestly, it looks like one of your only mistakes here is the macaronage stage, it seems you weren’t at the right point. So overall I think you did super well for your first try. Every time you make them it will get easier. Good luck
Thank you for such a detailed recipe! I had made 2 failed attempts before and was determined to succeed, and following your directions was the key! I also bought some silicone mats and a decent piping bag, which I believe was also a factor. It helps so much that you listed times and settings on your Kitchenaid, which was what I used as well. The only changes I made was using vanilla powder, and I added a tiny bit of cream of tartar which I’m not sure I needed. My macaronage was probably undermixed slightly, but I had overmixed before and wanted to err on the side of caution. They still turned out decently!
Hi Caroline,
I’m glad that your macarons turned out well. Practice will get you to where you know exactly what to look for in the consistency of the macaronage step.
So keep trying and remember: if it isn’t perfect, you can just eat the evidence.
Keep going, you will get there!