Intro • Day 1 • [Day 2] • Day 3 • Day 4 • Day 5 • Day 6 • Day 7 • Final Thoughts • Day 15
Day 2:
add . . .
2 T. whole grain flour*
2 T. juice or cider
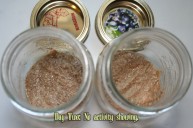
Other than a slightly lighter/yellower colour and a slight aroma of pineapple in the right hand jar, neither mixtures show any change from how I left them the day before. Even the spatula marks in the goo stayed the same.
(Side note: As with nearly all photos on this blog, you can click on small ones to see them full size.)
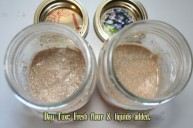
I add the rye flour and appropriate liquids to both and set them aside for one more day. We now have 4 Tbsp flour and 4 Tbsp liquid in each jar. The kitchen temp is currently 79ºF/26ºC. We’ve turned the AC on at night.
Tomorrow is our last day to add rye flour and pineapple juice. This second/third day period is typically when “other” bacteria(s) start to perk up and give a rise while our desired yeast is still dormant, waiting for the environment to be just right. Wally’s jar might therefore show activity or a “false rise” which could last a day or two then die out, then not much happening for a few more days before the pH is at the point where the desired yeast decides to wake up. The “not much happening” part is what the whole Pineapple Juice system is there to counteract, as that’s where people think “I’ve killed it” and toss it out.
In PJ’s jar, because we’re lowering the pH using pineapple juice, this should be an uninviting environment for most unwanted guests and we would be skipping the false rise stage. The yeast , however, should then find it close to just right and begin to wake up soon.
At least, that’s the theory. Let’s see what happens tomorrow.
“Caught” vs “Cultured”
You’ll often read or hear people mention that they “caught” their wild yeast out the air when they talk about their starter by leaving a bowl of wet flour by an open window. After all, in just a couple of days of their flour paste being left out near a breeze, there was activity and eventually, they got an active starter.
Even Alton Brown, in his segment on Sourdough Starter, perpetuated this long-standing idea. Unfortunately, this is not the case, as romantic a thought as “catching” yeast may be; yeast do not go floating about in search of wet flour on people’s window sills.
It’s actually quite a bit more mundane than that. All the yeast and bacteria we need attached themselves and grew on the grain as it was growing in the fields a long, long while back. In other words, all required beasties are naturally in your flour already. Nothing (of significance) fell in it or was attracted to our flour soup. You can start a starter in the dead of winter when no windows are left open because the yeast was on the grain already. Although cooler winter temps may slow the process down a wee bit, it will still happen.
It’s better to use a whole grain flour like rye or whole wheat as the outer shell of the grains is in the flour and therefore offer a much, much higher count of the beasties we want to cultivate. There is still some of this culture in unbleached white flour although the process removes the outer grain shell. Bleached flour will have processed even more of the beasties off. So give yourself – and your starter – a head start and use a whole grain flour. You only need six tablespoons so a small bag will be plenty or if you have a bulk section at the grocery store, pick up a half cup or so of rye or whole wheat (rye is slightly better).
As you can see, both of our jars here are well lidded at all times save for adding liquid and flour, any yeast and lactobacilli we cultivate will be from what was already present on/in the flour. Granted, this isn’t an hermetically sealed science lab with autoclaved tools and equipment, but it’s close enough and it certainly isn’t uncovered bowls sitting by the open windowsill.
So now you’ll know that when someone says they “caught” some wild yeast in their kitchen, it’s actually more a myth than anything else.
We interrupt this blog post…
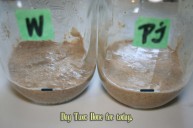
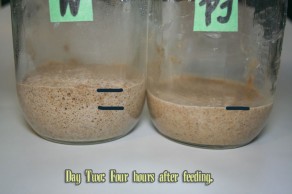
Well, I guess this isn’t a surprise really, but we already have visuals of the first rise happening in a very definite fashion. Here we are just four hours after feeding on day two and this is what I noticed on the counter:
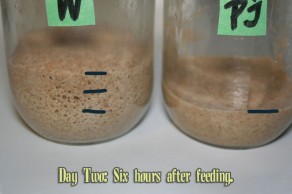
Walter has picked up a major amount of activity while PJ is pretty much just where he was after the second feed. I’ve digitally added some marks on the jars to make the increases easier to view. I’ll try to add more pics over the next several hours and see how things are progressing.
I just popped open Walter’s jar and man-oh-man, stinky!! Not pleasant at all. This is the set of “First Wave”, gassy bacteria including Leuconostoc and associates. They do not last long as they tend to reduce the pH levels which they do not like but the next stage of bacteria do. So these bacteria basically wipe themselves out but set the stage for the next round.
It is at this first “growth” stage, however, that many people think their starter has begun to develop properly. It is rising which is, true, what you want your starter to do. However, the wrong critters are doing the rising and they don’t have much staying power. Soon, hopefully tomorrow, the starter will have deflated and then it will be a day or several before we see the next visible signs of activity. During this extended deflated period (in the water starter) is when people think their starter, which they thought had been going so well, has now died on them.
Nope, it’s just a stage it goes through and for a water starter, it’s actually necessary to go through in order to start the pH lowering process. Without this activity, sometimes including a stinky resident like Walter’s getting here, and the acids they produce, the flour would never get a pH low enough to start up the “good guy” Lactobacillus sanfranciscensis which in turn start setting up the environment to one favourable to waking up the dormant yeast cells.
Which is what PJ is working on already: setting up shop for L.sanfranciscensis.
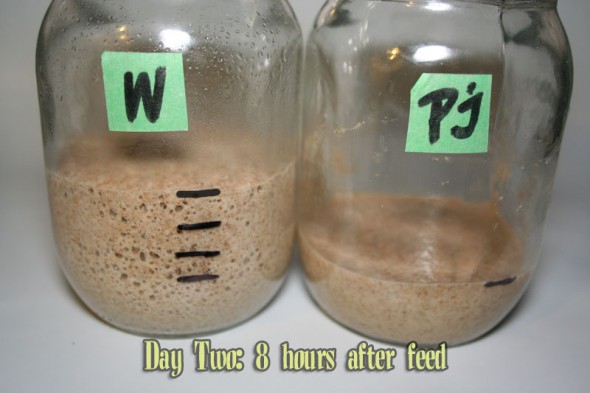
Here’s Walter at the 8 hour mark after feeding. It’s also 10 p.m. so we may well be done for the night. If he keeps growing overnight, we’ll be able to see a “high tide” mark, should he deflates by the time we look in the morning. PJ is still unchanged.
Intro • Day 1 • [Day 2] • Day 3 • Day 4 • Day 5 • Day 6 • Day 7 • Final Thoughts • Day 15

Paul
I’m on day two. I had tried the BBA barm which did not work. I have some King Arthur starter, but am excited about this one. I want to try the dark rye bread that the bread baking babes have posted.
Do you live by any counted cross stitch/needlepoint stores? They are a great source of linen for the couche. You want a heavier piece.
Crazy couple weeks, I am off my breadbaking schedule am excited to be working on the Italian bread.
Keep us all posted when your new starter starts acting up! Should be in 2 or 3 more days.
Hi Paul,
I am just about to begin a sourdough starter, I do not have a jar with a screw top. I am wondering if I can use a clear glass vessel (think small vase) with cling wrap securing all the little barteria inside as the home for my starter. I will change the cling wrap, of course, each time I am inside feeding and checking the starter.
Thanks in advance for any advise you may be able to give me.
Hi Patti,
The jar is not the important part, as long as it’s size and shape works. The starters you see in the test all managed quite well in 500 ml containers. As for the lid, plastic wrap and elastic would work fine too. And you could put that in a large water glass just as easily. A clear plastic tub (like a deli tub) would do as well. I’d just suggest avoiding “square” jars since the corners can get annoying (said he, knowing that’s exactly what Walter and PJ are in so speaking from experience). But anything in the 2 cup size is more than large enough; my guys eventually went into a 250 ml (1 cup) jar and that fit just fine.
Pickle jar: shaped well – tall straight sides and large opening with very small lip. In this case, the lid may be a problem because the rubber ring inside tends to hold on to the “pickle smell” even after a couple of runs in a dishwasher. In that case, going with the plastic wrap and rubber band is an excellent choice.
There’s no chance of a starter explosion with plastic film & rubber band, the seal isn’t tight enough to build up pressure. A tightly fitting lid, however, potentially could if the starter were to get that active and fill the jar completely and then some. But that would need a fair sized amount of starter to fill the jar and a pretty active one. So if you’re going to use a screw on lid, screw it on but not tight. It’s there primarily to keep dust, bugs and debris from falling in and the starter from drying out.
And you wouldn’t need to constantly change the cling wrap. Unless it got bunched up and was a pain to flatten out again.
Hi Paul,
Well, Paul, I chickened out on the cling wrapped vase…..mental pictures of finding starter on my ceiling encouraged me to look in the refidgerator for a glass jar…and viola, I found the perfect jar. It is glass, has a wide mouth, in its former life was home to a few dill pickles. It is now going to be the new home for my starter, his name…Vlasic!
Wish Vlasic luck!
Day Two:
No increase of Mina (starter name).
A very small amount of bubbles but nothing to speak of.
House temps during the day – 69 deg. At night 64 deg. Slow and steady! Not expecting much for day three, but will move the starter to a larger jar for the expected expansion! LOL
Deka
Print pickle 2.0 started to form some nice bubbles and to rise a bit 25% i would say.. I am using pineapple juice.
Good start i guess.
Sounds like! Keep at it, you’ll have a working starter in a couple of weeks and even better in a few months when it develops it’s own characteristics more.
I just finally started mine over again yesterday evening after getting home from work. Rye flour and bottled (deer park) spring water. Kept it on top of the oven under the microwave’s oven light where it’s about 75F at all times. When I got home from work today (end of day 1, start of day 2) I found it’s risen to TRIPLE what it was when I first made it. It smelled a bit funky, but not overpoweringly so, so I’m treating it as if the false rise hasn’t happened yet and went ahead with the normal day 2 instructions here.
I’m storing mine in a mason jar with a paper towel under the lid-frame-thing instead of the actual cover insert so it can breathe a little bit. So far it’s looking like a huge success. I’m using this organic, stone-ground rye flour and it seems to be working really well.