

This post will be mostly baking photos so that I can get the last bit of the Bread Section recorded in here.

The last bit of the Bread Section (Part 1) at The Culinary Institute of Vancouver Island had us repeating, for the final two weeks, the several areas we had been through during the first six weeks, except we hit each station for just two days. Sort of a “Rapid Fire” version of the original stations which wasn’t actually that stressful as we already “been there, done that” just a short while before.
So here are, not necessarily in chronological order, a whole bunch of photos from theis Bread Section for your visual enjoyment.


Here’s Kevin, my “partner in crime” for this Bread Section, readying a recipe.
And (finally) I managed to get a snap of Angelique, the bakery department’s Assistant; she’s the one who knows where everything is, orders stuff for us and is generally the “power in the background” that makes the whole thing run smoothly. She was a student here a couple of years back herself so she also has a few tips on how this all works.


Pita Breads in two varieties, getting baked.
[easyazon-image align=”left” asin=”1580082688″ locale=”us” height=”75″ src=”http://ecx.images-amazon.com/images/I/517BQgzhYzL._SL75_.jpg” width=”69″] The white breads are made using Peter Reinhart’s Lavash Crackers recipe from [easyazon-link asin=”1580082688″ locale=”us”]The Bread Baker’s Apprentice: Mastering the Art of Extraordinary Bread[/easyazon-link]. the recipe includes a little honey and veg oil, so the bread is enriched and softer than it would be with a straight, flour-water-salt only dough.
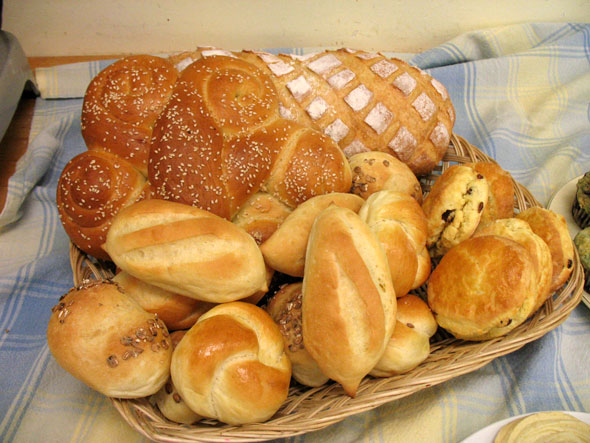
The whole wheat ones are made using a basic Whole Wheat Bread recipe we use for, well, plain ol’ whole wheat breads. This would show that pretty much any decent dough can be used for pita breads. This is the same whole wheat bread we used in the loaves at the very top of this post (beautifully slashed, I’ll add, by Chelsea who was on Ovens that day).
The bread disks are put in a very hot oven where they puff up very quickly. They are removed once puffed and flipped over so the opposite side faces the hearth or top. Watch out for steam escaping from the very hot interior of the bread, though, and act fast. Once they puff up once more, they are taken out and stacked as shown to cool; stacking them this way helps them deflate before they harden and keeps them from drying out too fast. The whole baking process takes just a few minutes from raw dough disks to finished bread cooling off.
Danishes


For the Danish station, Kevin and I came up with these Passion Fruit danishes, based on this recipe from chef Eddy Van Damme – his original was cassis based but we had none available. Passion fruit tasted amazing, even if it don’t have the “pow” of the purple cassis, visually.
Bialys two ways


Well, sort of two ways: we’re looking simply at the finish here.
I was assisting Andrea and Nicole with their special bread, bialys, when Mr Barnet came by to indicate that these would next be finished by egg washing and sprinkling with poppy seed.
“Gasp!” said I. That isn’t the “traditional” way of making bialys. So Mr B suggested we do it both ways and see which came out best.
The one on the left is filled with a little of the roasted onion/poppy seed mix, then the filling spoon was wiped atop the bread’s surface, leaving the crust to brown up a little and tasty remnants of onion and poppy seed delicately spread about. Now if this had been my take completely, the onions would have been more of a paste than diced and would have given a better coating to the top of the buns. But I was working with Mr B’s onions & poppy mix here so this was what I could do.
On the right: Mr B’s version, using the same bread disks and a somewhat more hefty amount of onion filling, but finishing up with a coating of egg wash and a sprinkle of poppy seed to the tops. This gives the breads a more golden baked finish.
Who’s is more “correct”? Not easy to decide. First, my version should have stayed in the oven a bit longer – they’re looking very anaemic. Second, it’s likely true that today’s consumer would prefer the “nice golden” even look of the egg-washed version. But if one goes by the bialys produced by places like Coney Island Bialys and Kossar’s Bialys, both New York bakeries that have been making bialys since the 1920s or 30s, just before all Jewish bakeries in Bialystock, Polland disappeared (a travesty of pre-WWII activity): there’s no egg wash used.


Left: Coney Island Bialys. Right: Kossar’s Bialys. Note they are both baked a little deeper than mine had been allowed to.
So here’s my friendly argument with Mr B’s technique: should we be messing with tradition? I think in some case, like these, no. These are the sorts of ‘tweaks’ to classic methods that eventually lead to the soft, fluffy, uninspired bagels that can be found in stores everywhere these days, not even close to what an original bagel should be like. The original bialys – whose actual name is bialystoker kuchen – taste great, have an interesting texture and a bit of history. They can and have stood on their own this way for nearly a century. Is it really necessary to “update” them?
Post your own view below.

Final Exam for Baking Section 1
During the last week , we needed to produce a set of baked items to be marked for our mid term exam. These were:
- Challah breads: 2 loaves, 12 buns
- Empress Hotel Scones
- Tart shells (buttertart filling supplied)
- Muffins of our choice
- Piped Shortbread Cookies
I volunteered, as did three others, to be the first set of people to do this bake-off. We had from 6 am to 11 a.m to make all of the items from scratch.
You can see my finished products in the photo above. Although we still haven’t received our final marks (there is also a written test we did a few days later), Mr B’s comments were fairly positive, although I did do some miscalculations reducing the original scone recipe down to the dozen required here. Not enough sugar. This was clearly an error on my calculations since the original recipe makes 24 and the task, in part was to cut the recipe to 8 so I only needed to reduce all amounts to 1/3. Urgh, a silly mistake that should have been obvious.
The other thing he mentioned was the cookies were slightly underbaked – there was a wee little taste of slightly raw dough noticeable. Another minute or so would have done the trick.
Otherwise, it all turned out quite well. Now I have an idea of what all those “Top Chef” type show contestants feel like when there’s a clock going and a pressure to excel. Timing is everything and part of the issue with the cookies. With four of us baking while the kitchen was doing it’s normal routine as well, I was shut out of the oven until the very last minute so I jumped the gun a bit to get my presentation done. My problem, though. We were also marked on our Mise en Place, which included the logistics of when to make what in order to simultaneously make and bake five different items. Other than the oven bottleneck, I think I did pretty well.
I didn’t get the other folks layout photographed that day (sorry!) but I did snap some pics of the batch from two days later:


Mr Barnet tasting and marking the goods. There’s Kev and Sara’s output.
And while people were taking their tests, we were still pumping out the normal lots of baked goods…


The first photo is of a set of baguettes Kevin and I made up a few weeks before. Note they’re somewhat odd shaped and poorly slashed.
Next, we made baguettes on the last day and this is the new batch of dough, slashed and ready for the oven. Below that, the same baguettes baked and ready to be sent up to the Culinary class for sandwiches. There’s much improvement in the slashing and shaping. The bottom two are my slashes and they should have been a little less diagonal, I think. You can’t really see much “gringe” on these, either. Still, not a bad batch at all. We didn’t get to cut them open to check the crumb or taste them as the Black Hats (cooking students) were there to pick them up the instant they came out of the oven.
Sourdough Bagel Fail
The day after my exam, I made up a batch of sourdough bagels using “Lucy”, the class white starter. With only two days at our disposal, it was sort of imperative to get these going as quickly as possible before the end of our station and, in fact, of Bread I section. I had fed Lucy the night before but she had just come out of the refrigerator and wasn’t, in reality, up to snuff. Another feed or two and she’s have been going gangbusters. Alas, not the case. What we ended up with was bagels that just wouldn’t bulk proof and, in spite of forging ahead to beat the clock, when we tried to boil and bake them the next day, they sank like lead rings in the malt water. We baked a dozen to see if they could at all be rescued but… no. Tasteless. Really tasteless, no flavour at all. Not even “bad” flavour. I hope the other class get to give these sourdough bagels (I used the Mike Avery recipe you can see here) another, less frantic go and start to produce these really tasty bagels on a regular basis. The ones we make now are ok, but these, when made right, knock them out of the park effortlessly.
Pro Tip: Never rush a sourdough starter; you’ll simply be wasting your time, energy and ingredients.
I also made a batch of 40% Rye Bread with Caraway that very last day with “Roland”, the class rye starter. This one I had taken home a couple of days before to get going properly. These turned out rather nicely and tasted great. But then I’m a bit of a rye fan. I even made another batch at home when I had finished this loaf. MMmmm rye bread…

And there you have it, end of the first half of the Professional Baking course. The following week, we start on Pastries II where we are to get into more intricate deserts. Midway through this section, we’re heading out to paris for Europain, back for the last three weeks of Pastry II, then into Bread II until May. At that point, we are to be doing a Parcticum while working in a real live bakery for a couple of weeks, then it’s graduation.
Good grief, time flew by fast!!