Preamble: None of the following is original to me in the least. Here I’m merely collecting the wisdom of much more experienced bread makers into one easy to find spot. And I’m not even saying this is “all there is”, much more can be found on the web, from other people with different methods.
Stretch and Fold
This is a method of handling dough which pretty much replaces, in whole or in part, the more traditional “push and turn” method of kneading of the dough.

I’ve created a Step-By-Step photo illustration of the process in it’s own post here: Stretch and Fold Again. Although, as with most anything, there are variations on how it’s done, the basic principle is as follows:
Take your dough that has been resting and turn it out on the counter. The counter should be either very, very lightly floured for the first fold of regular dough, slightly dampened for first fold of wet dough or unfloured for 2nd and later folds of either.
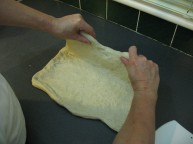
Gently press or stretch the ball of dough into a large squarish shape. Mike Avery says to stretch it to about 1/3 the thickness of the original ball so if you plopped the dough on the surface and it was 3″ tall you stretch it to a square about 1″ thick, using your scraper to help pull it out from the centre. Once it’s square-ish, grab the top edge, pulling this section up to give it a bit of a stretch, then fold it down over itself to about 1/3, much as you’d fold a piece of paper in three. Next, grab the bottom section, give a stretch and fold up over itself so you’ve just folded you square into three, like you would fold a sheet of paper.
Now take the left side and fold over to the right, then finally the right side over to the left and you’ve got a stack of several folds (nine, in fact) and given a stretch each time you folded. Voila, you’ve “stretched and folded”! You’re done. Return to the raising bowl until your next fold. Check the post for a more detailed and photographed explanation.
Below are some videos from several people, just to show that there’s not just One Authoritative Way of doing it…
Here’s Mike Avery of SourdoughHome.com showing how he does it. Have your audio on because he’s explaining what’s happening and giving tips while doing it. In this clip, he’s already mixed the dough just to the shaggy stage. All kneading that would occur next is then replaced with Stretch and Fold:
[youtube]http://www.youtube.com/watch?v=hxqmWxWBDSQ[/youtube]
A complete demonstration with more videos of the Stretch and Fold technique by Mike can be seen here, starting with the rough mixing of the dough (plus the recipe he’s using). There’s actually a fair bit of other info in this set of clips that are well worth reviewing.
Another professional baker, Mark Sinclair of Sinclair’s Bakery (formerly Back Home Bakery) shows his technique which you’ll see is a little different from Mike’s. This indicates that there isn’t One Authoritative Way of doing Stretch and Folds.
First off, here’s Mark showing this technique on some Rustic White & Kalamata dough. He’s working on dough that has been mixed well in a larger mixer, unlike Mike’s example above which starts with just barely together dough.
[youtube]http://www.youtube.com/watch?v=j0o4asEGW78[/youtube]
“In the tub” Folding
Aside from the above techniques, you can also fold your dough “in the tub” or container. One reason you might wish to do this is if your dough is a wet, high-hydration dough, like ciabatta, and would be a little more difficult to handle. OR if you would simply rather not mess up the counter for what is less than a minute’s worth of folding. Whatever the reason, it’s completely possible to fold you dough right in the proofing container and really, the dough won’t care where you do it. I’d venture that less hydrated doughs would be easier on the counter but you can decide what seems best for you.
Next, Mark shows Stretch and Fold on a ciabatta dough which is a rather wet dough. (Watch lots more How To videos from Mark on his YouTube space)
[youtube]http://www.youtube.com/watch?v=UKdNmbp1s5w[/youtube]
You can even do the Stretch and Fold right in the mixer bowl:
[youtube]http://www.youtube.com/watch?v=y9UC0dnGBK4[/youtube]
Comments:
As you can see, this technique is a super easy and simple way to get the same results as you’d have doing the more traditional and physically challenging “Push and Shove” type kneading technique. But even so, there are people who still prefer the older technique and say they actually enjoy the workout, they find it better because they really feel the dough as it changes texture under their hand and for many it’s even a “zen” thing, it relaxes them.
If that happen to be your take then, absolutely, go for it. A big part of the joy of bread making is the artistic/personal connection you have and if traditional kneading gives you a better connection then please don’t stop it just because there’s “another” technique. They’ll both get you to the same place, just using different roads.
On the other hand, the stretch and fold method is a godsend for those who may avoid bread making BECAUSE of the physical aspect of kneading, people who are injured or may have arthritis, for example, or those who feel they are too ‘small’ to properly knead their dough. Although, as you’d see by checking out Mike Avery’s video page, he does show you that even traditional kneading doesn’t require a huge amount of force, it can be done in a much more gentle fashion.
So, if you want to make bread a little simpler, give the Stretch And Fold technique a try. It’s amazingly effective and gives excellent results with a lot less work.


Wonderful post – thank you so much for sharing all of these resources and information! It’s been SO helpful. While I’m one of those that love to knead bread, it’s good to know other techniques out there. Happy baking!
Hi – this is a different Kelly, by the way. I just wanted to say, for the French stretch and fold, how long is too long to handle the dough? I thought my dough was the same consistency as what was in the video, but apparently not. So after about 25 minutes and dough the same exact consistency as it was when I started, I gave up and added a ton of flour just to get done with it. I think I have a lot to learn about bread making.
I’m a very old time bread baker. I’m now using stretch and fold with great success. The old recipes are much dryer than today’s so I’ve been using modern ones. My question is can’t the old recipes just be made wetter for stretch and fold?
I also use much fancier flours which I love.
I’m retired now so have time to enjoy making bread. Sourdough is too sour for my liking so use I use poolish instead.
Marilyn
Yes, certainly you can change the dough hydration. Just increase the water by 2 – 5% (by bakers’ percentage) each batch until you get the consistency AND final baked product you like.
Modifying the water ratio will pretty much ensure a change in the final outcome, which you might (or might not) like. Only one way to see!
If you’re not using a recipe that goes by weight, your dough may not be the way the original recipe expected. Volume measuring is a very, (very!) imprecise way to measure your ingredients. See How big is a cup? Flour volume vs flour weight It’s possible that it’s very stiff because you are not using the same measure of four as the original recipe maker did.
Try using recipes that measure by weight, grams preferably. What you get will much more likely be a faithful copy of the original recipe.
And, as always, only ever change ONE thing at a time in a recipe or you won’t know for certain what thing made what change in the final loaf.
Good luck!